Before you start
An active proxy connection with its assigned protocol, hostname, port, full username and password. Copy those fields from your account or activation details. A browser profile does not create proxy credentials.
An AdsPower account and installed browser application. This guide covers a single profile with a custom proxy. It does not assume that every Crawlhub product offers every protocol or a fixed IP.
A custom proxy for the profile
AdsPower manages browser-profile settings and supports custom HTTP, HTTPS and SOCKS5 proxies. The protocol and account details must match the endpoint assigned by your proxy service.
- Profile-level configuration
- Keep the intended connection in the profile’s Proxy settings.
- Separate authentication
- Proxy username and password are separate from the account used to sign in to AdsPower.
- A connection test
- Use Check Proxy before saving or opening the profile.
- Session continuity
- Use a fixed assignment or the intended sticky-session configuration when the profile needs a stable exit IP.
1. Create or edit a profile
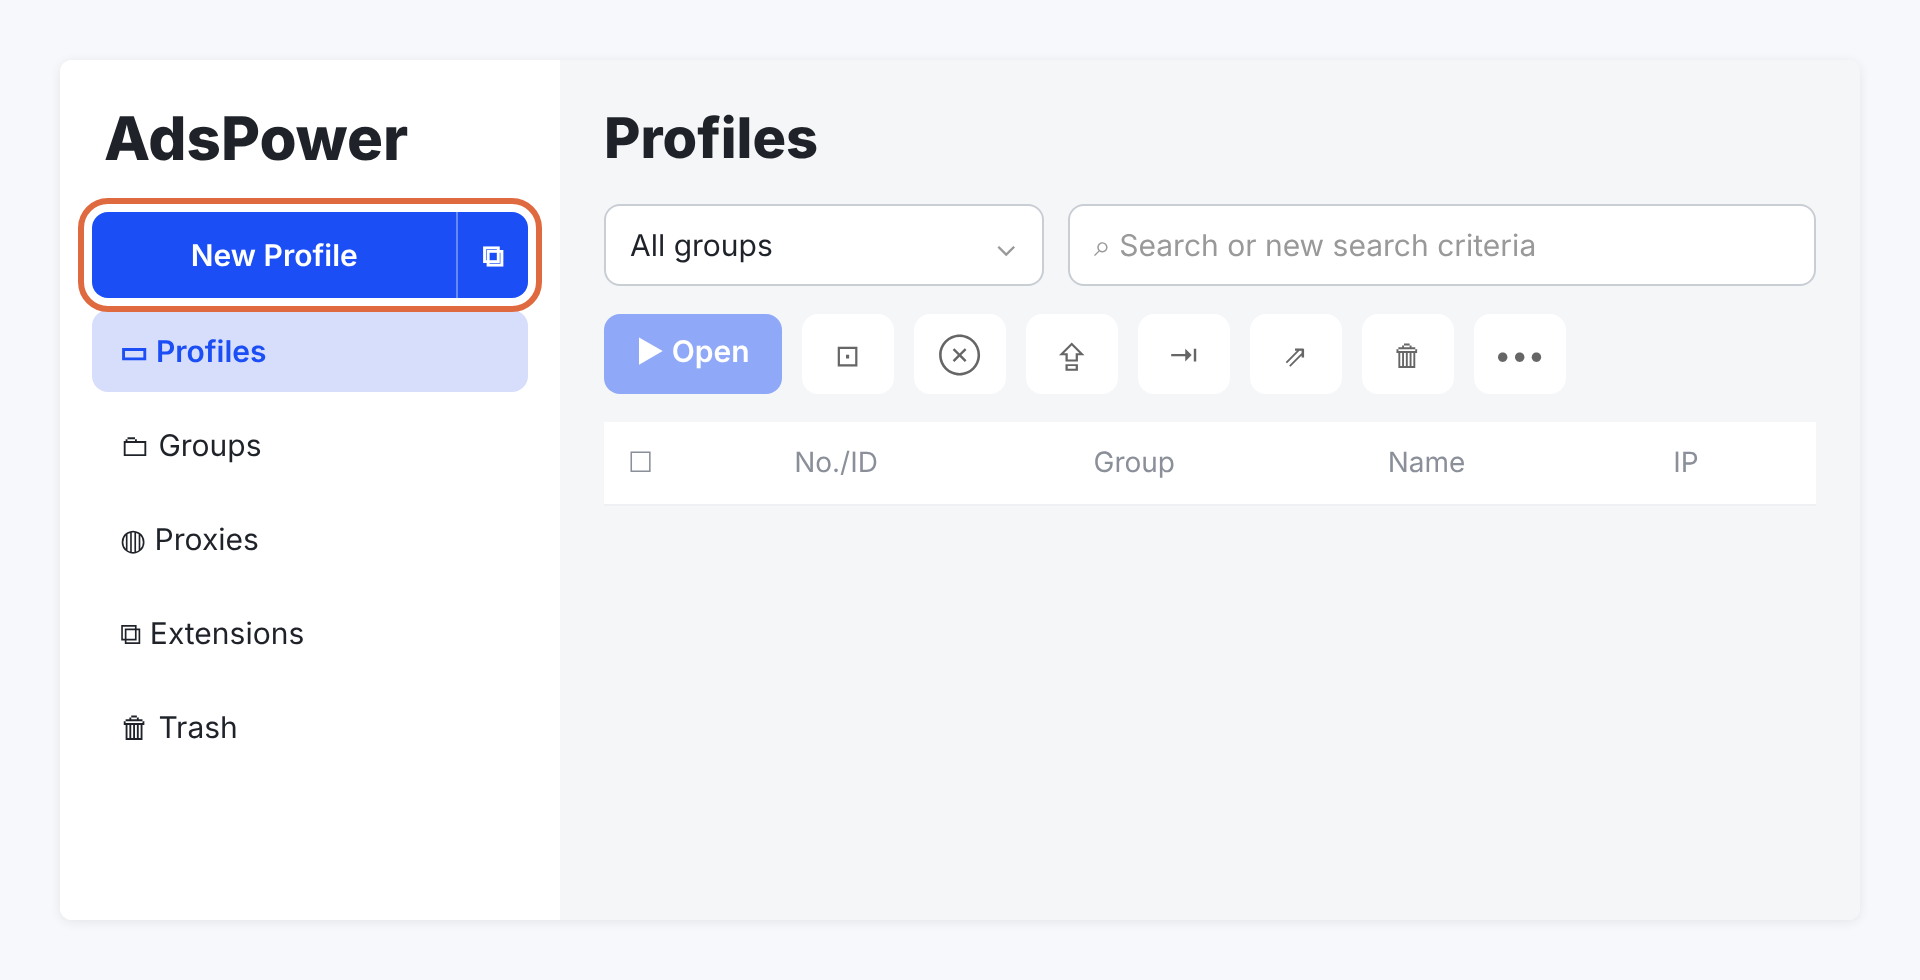
Open AdsPower and select New Profile, or edit the profile you want to configure. Give the profile a name that identifies its purpose.
Open its Proxy section and choose Custom. Leave unrelated browser fingerprint settings at the values required by your workflow.
2. Add the connection
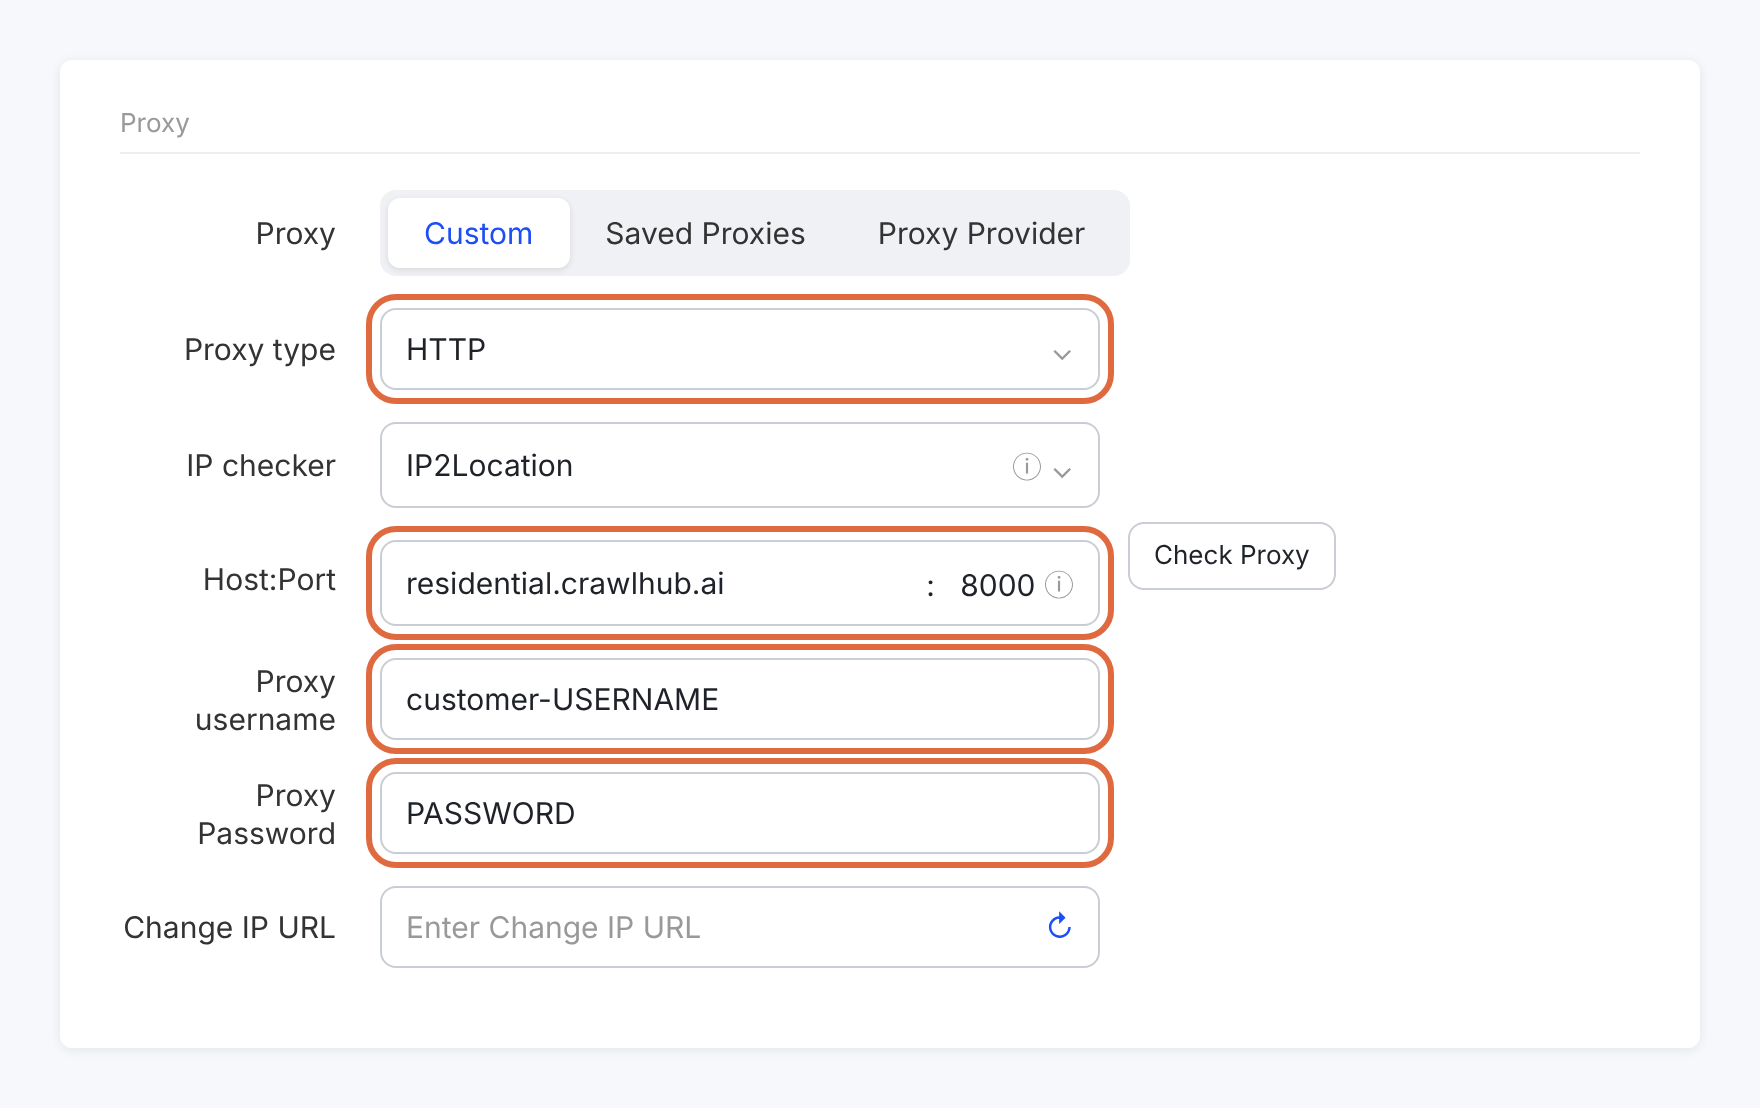
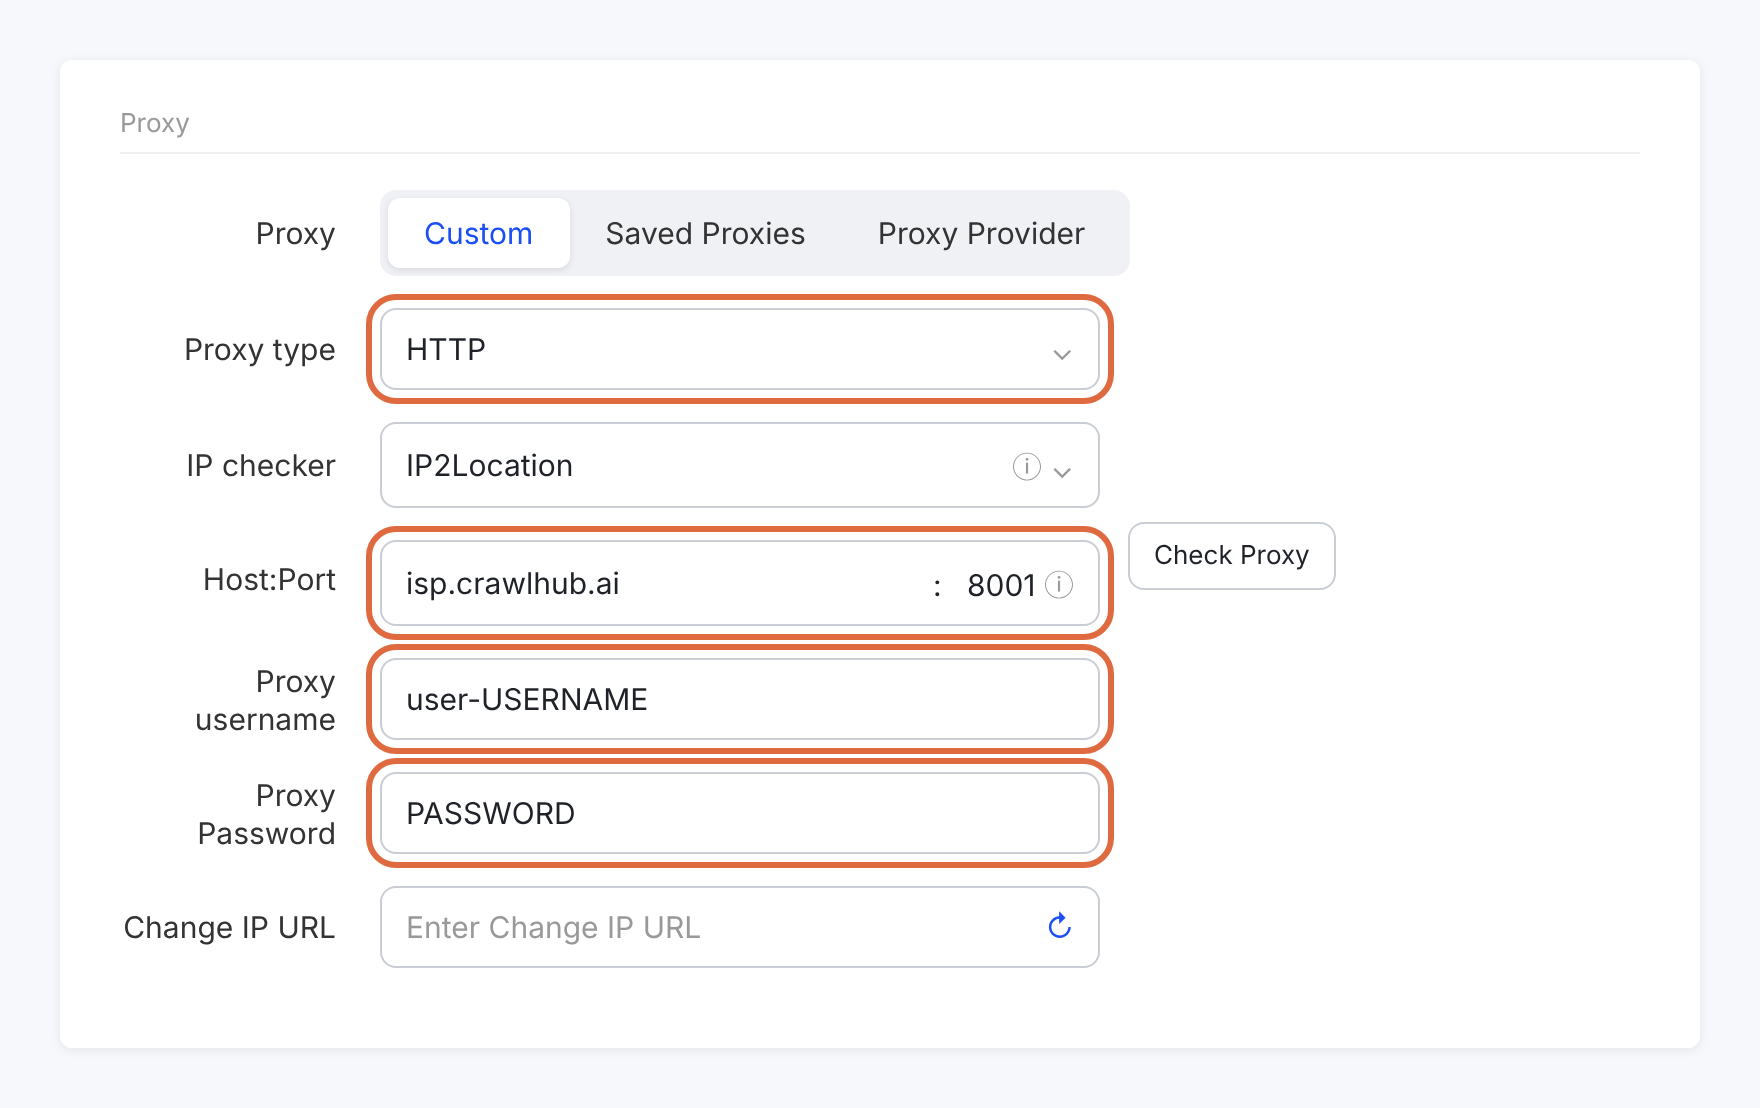
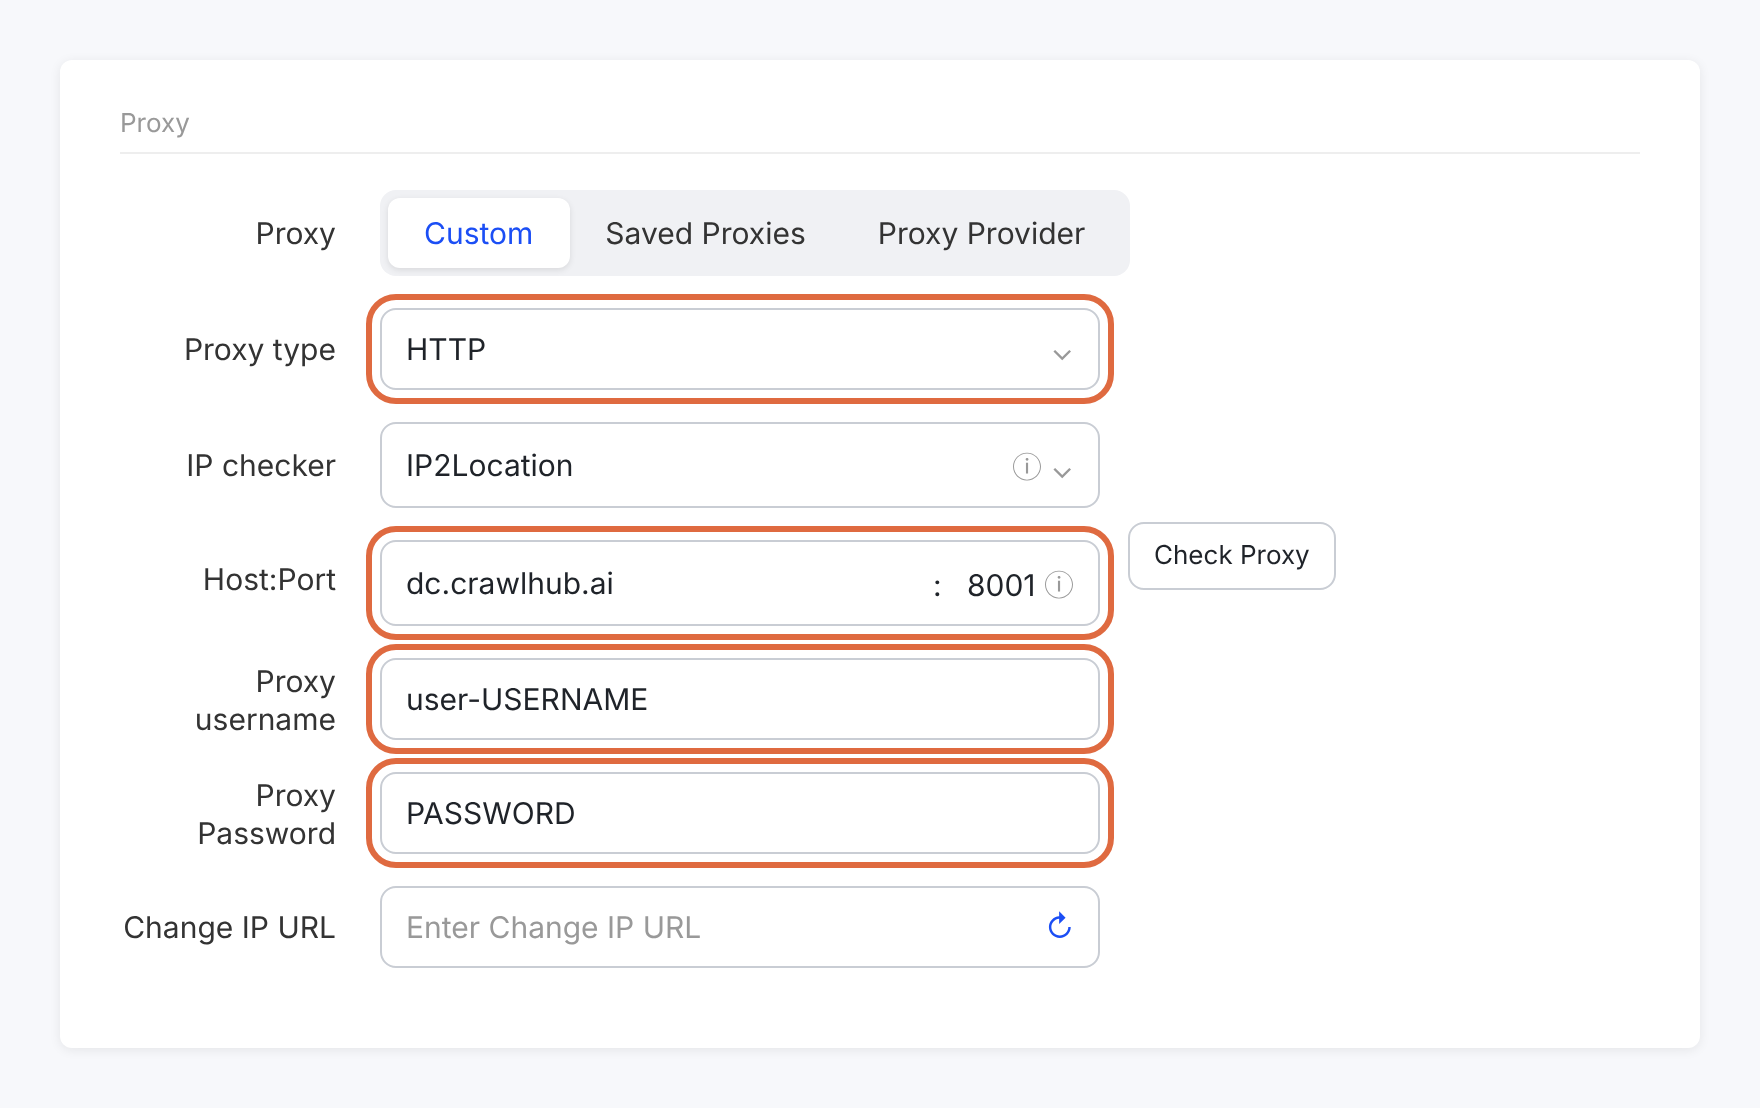
Choose the proxy protocol assigned to your endpoint. Enter the Host:Port, Proxy username and Proxy Password fields. AdsPower can also parse a provider-supplied IP:port:username:password string into the fields.
Copy the complete assigned username. Do not add country, city or session suffixes unless those values are part of your service’s documented configuration. Leave Change IP URL empty unless your service explicitly supplies one.
Enter raw credentials in separate username and password fields. URL-encode them only when a client requires a proxy URL; do not paste an encoded password into a normal password field.
The new Crawlhub v1 username specification is documented in the proxy parameter reference. Its planned gateway naming is separate from the live connection details assigned to an activated account.
| Connection field | What to enter |
|---|---|
| Protocol | Protocol assigned to this proxy endpoint |
| Hostname | Assigned proxy hostname, without a URL path |
| Port | Assigned port for the selected protocol |
| Username | Full assigned username, including configured session or location values |
| Password | Proxy password, not the browser-tool account password |
3. Check the proxy
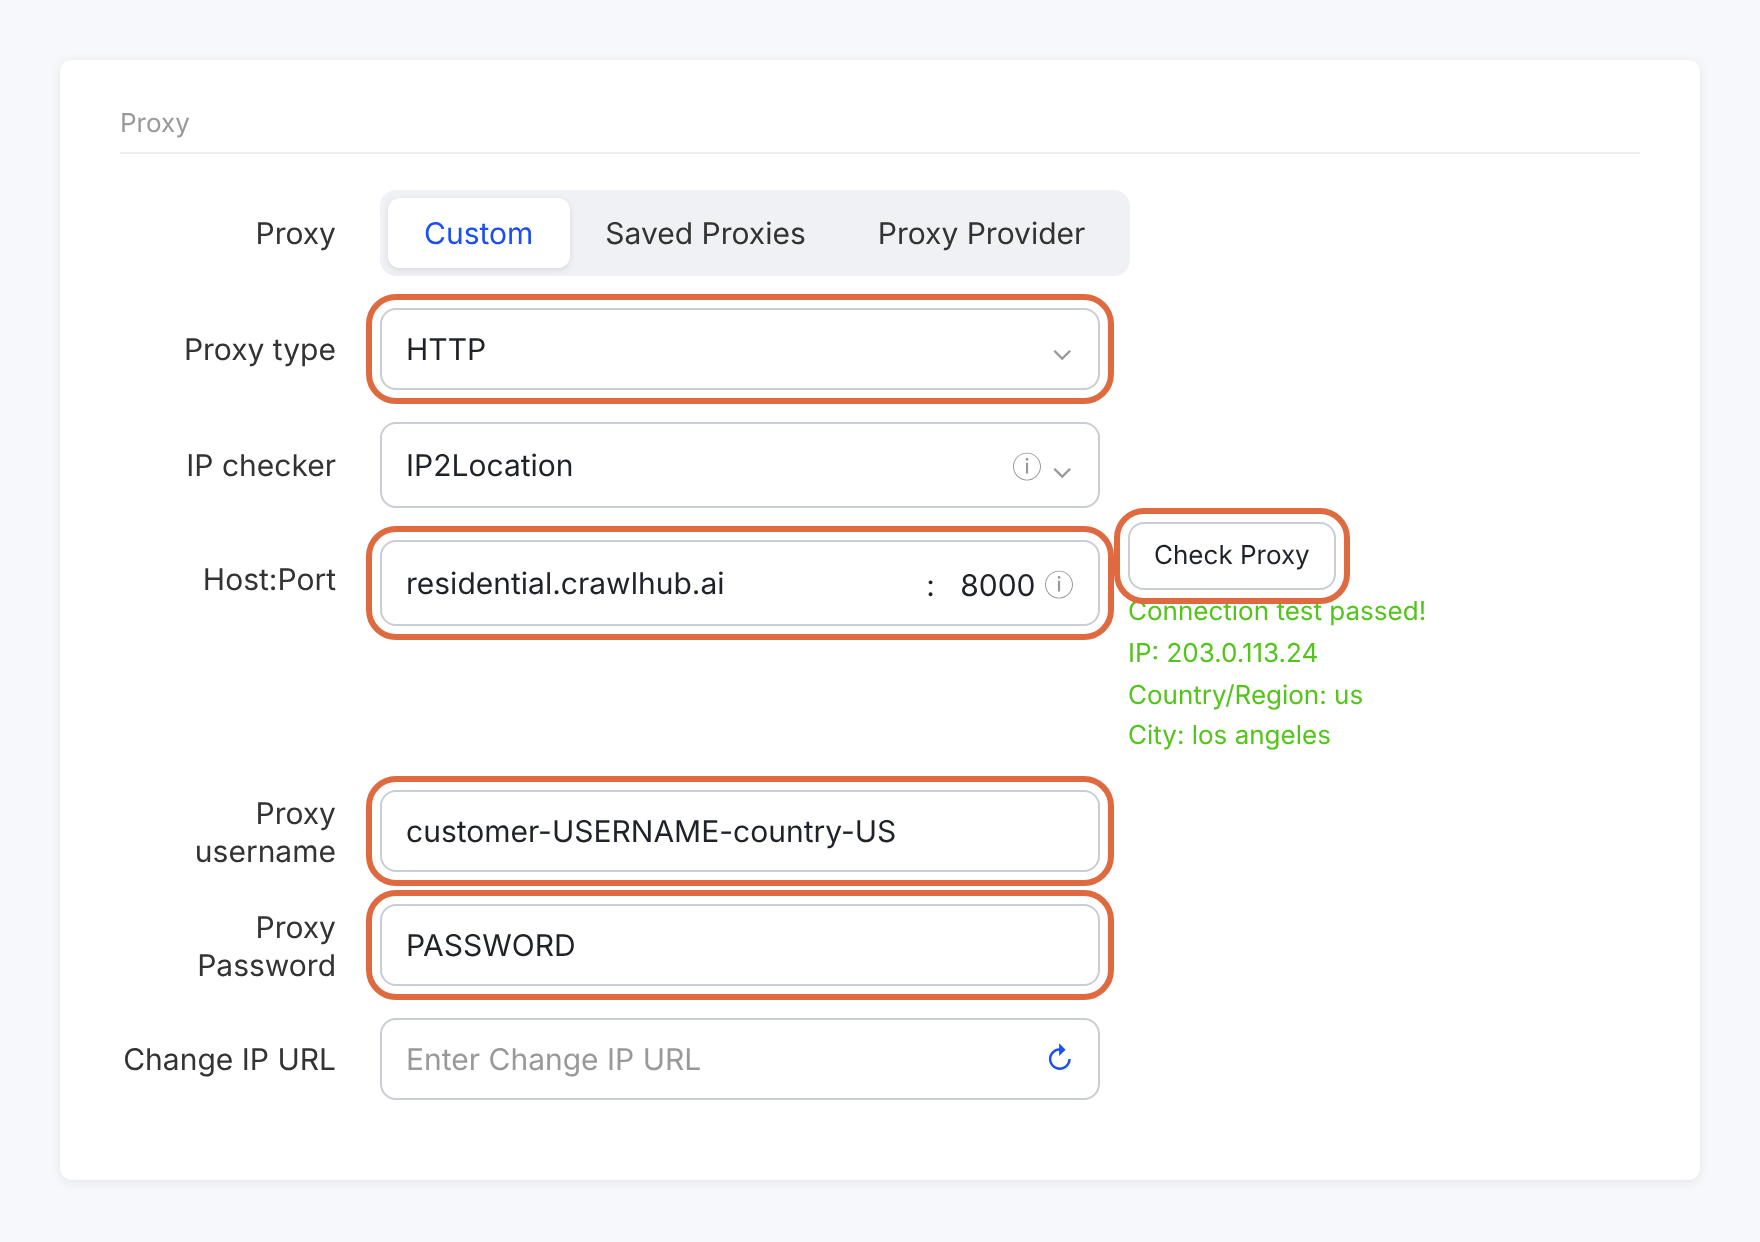
Click Check Proxy. A passed test means AdsPower connected successfully; inspect its reported IP and location as well.
If the test fails, correct the protocol, host, port or login before launching the profile. A saved profile by itself is not proof of a working proxy connection.
4. Save and open the browser
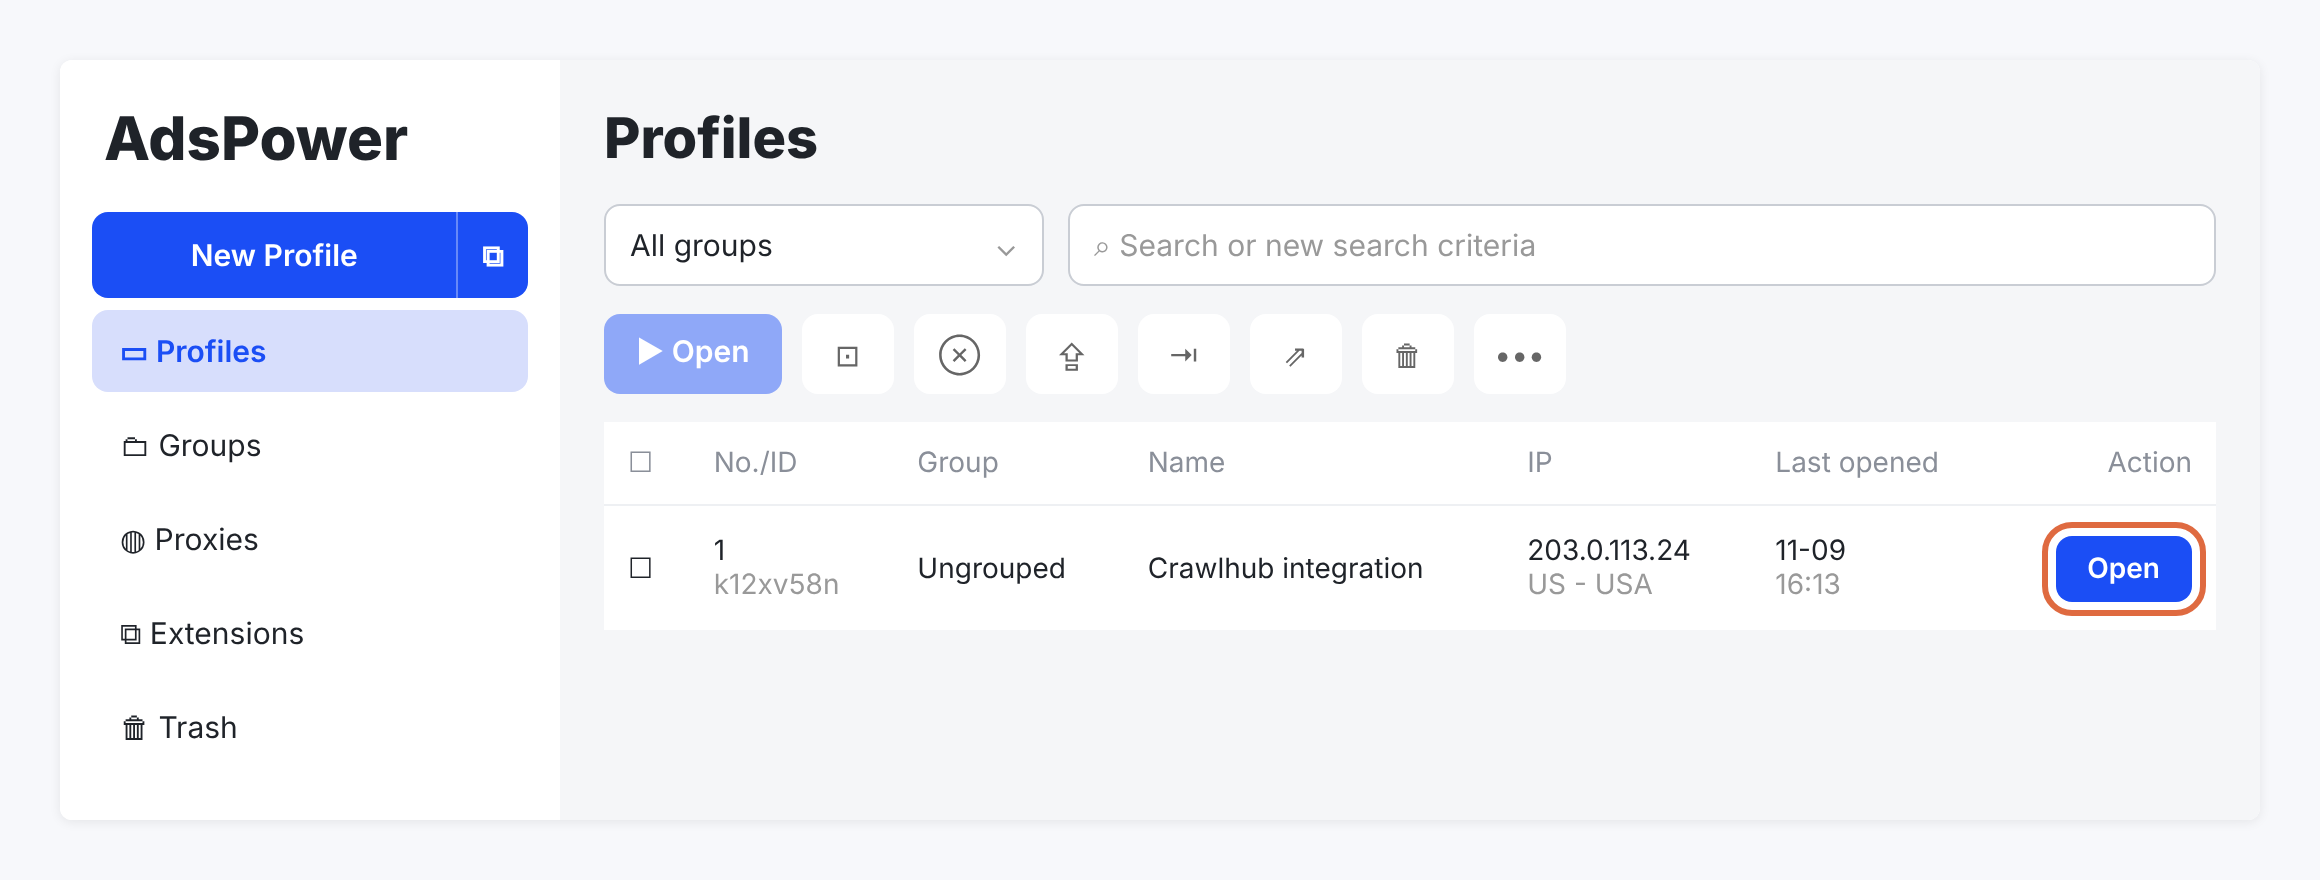
Click OK to save the profile, find it in Profiles and click Open. Check the exit IP from a page inside that browser.
Keep a fixed assigned IP or sticky session when you need continuity. Rotating residential connections do not automatically give each profile a permanent unique IP, and a proxy alone does not guarantee that accounts cannot be associated.
Troubleshooting
Connection test failed
Check the endpoint’s assigned protocol and port, then confirm the complete username and proxy password.
Exit location differs
Inspect the configured location and session values in your proxy account instead of adding guessed username suffixes.
IP changes after a restart
Confirm the assignment type and session lifetime. A browser profile does not pin an otherwise rotating connection.