Before you start
Use an activated connection and its assigned hostname, port, protocol, full username and proxy password. The proxy login is separate from the account used to sign in to the tool.
The interface references show Windows v4. Equivalent macOS menus and labels can differ. This walkthrough covers TCP routing; do not assume that UDP or QUIC traffic follows the same path.
Review existing per-app proxy settings before applying Proxifier. An application’s own proxy and a Proxifier rule can route the connection twice unless that chain is intentional.
What is Proxifier?
Proxifier is a desktop proxy client that applies routing rules to application connections. This guide covers a single proxy and application-specific TCP routing.
- App-level routing
- Choose the application connections that should use a proxy.
- Rules in order
- Match applications, destination hosts and ports, with the first matching rule taking effect.
- Proxy chains
- Use the vendor’s chain configuration when you need a deliberately layered route.
- Desktop client
- Use the licensed version or vendor trial appropriate to your operating system.
1. Get the application ready
Install and open Proxifier. Identify the application you want to route.
Understand any existing VPN, system or app-proxy configuration before adding another route. Configure the target app as required by Proxifier so its own manual proxy does not unintentionally duplicate the route.
2. Add the proxy server
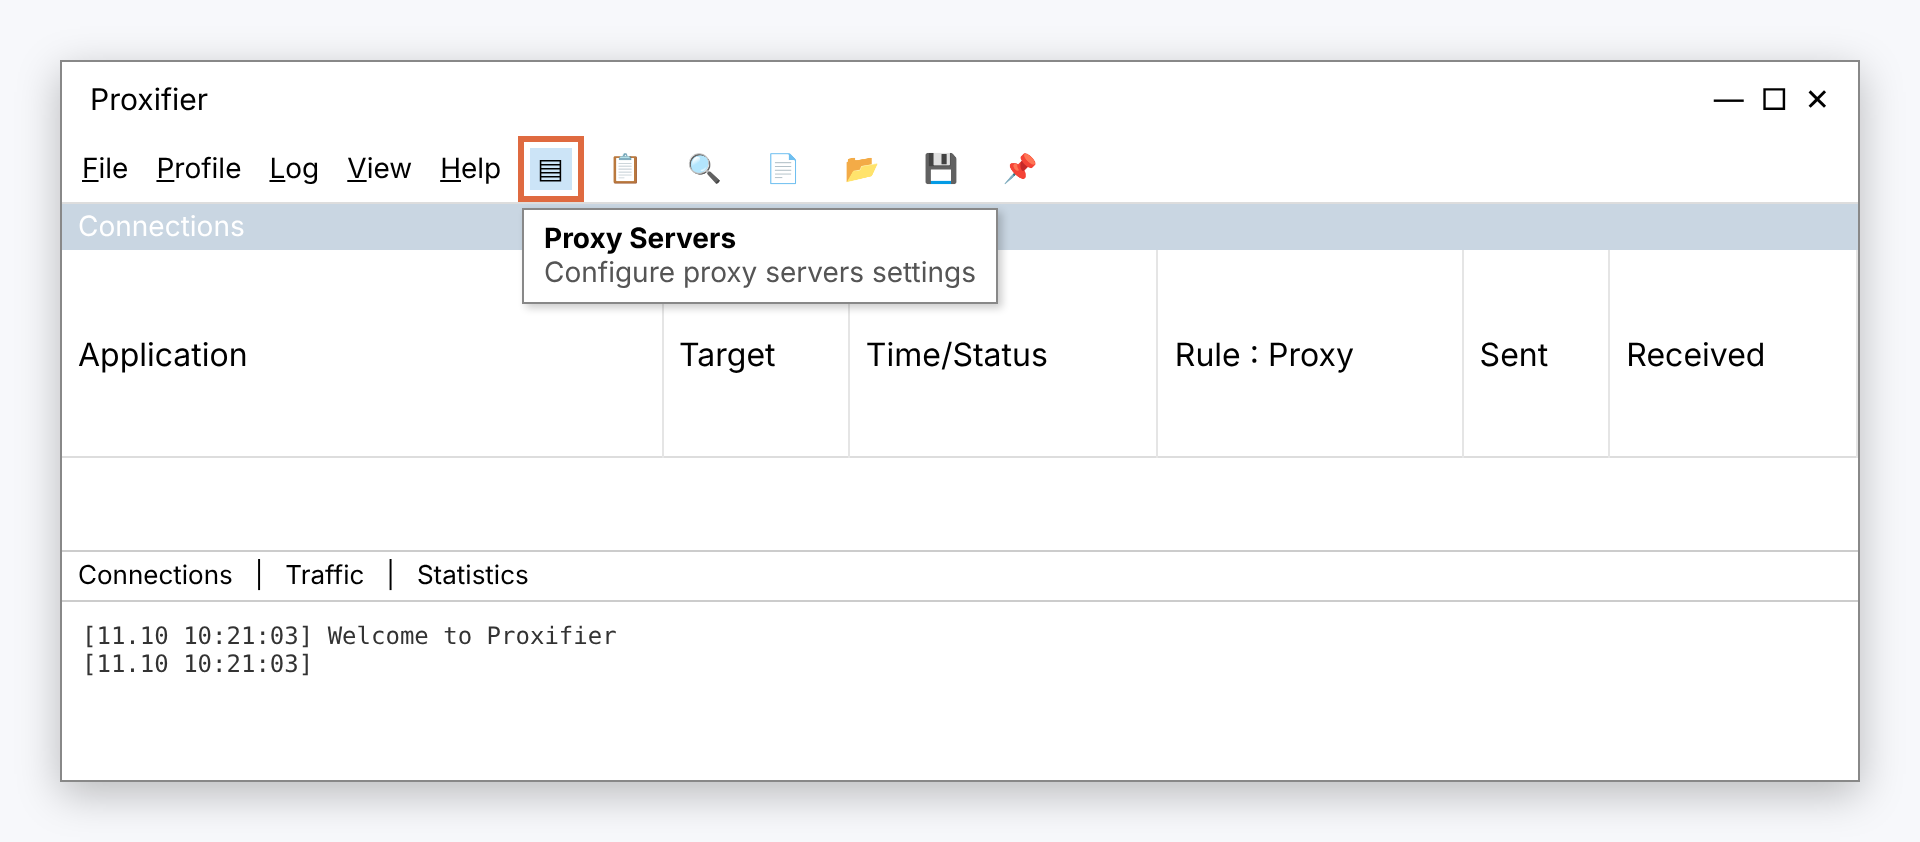
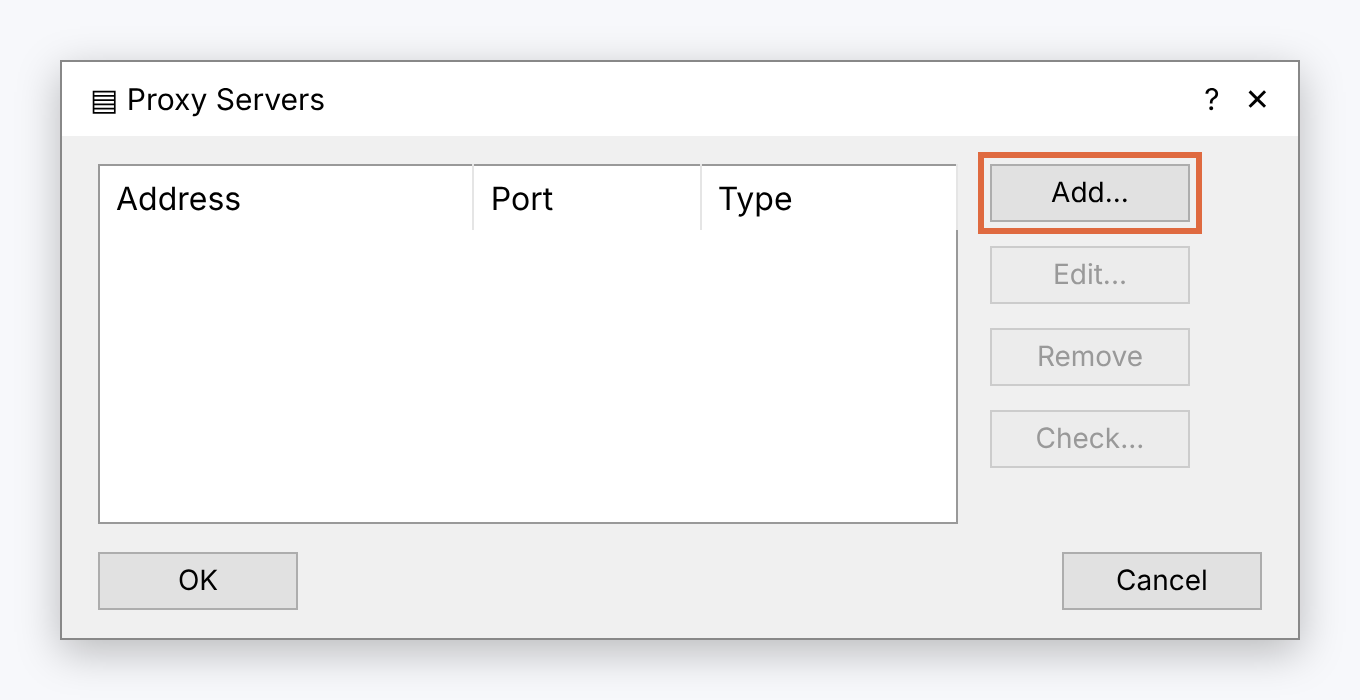
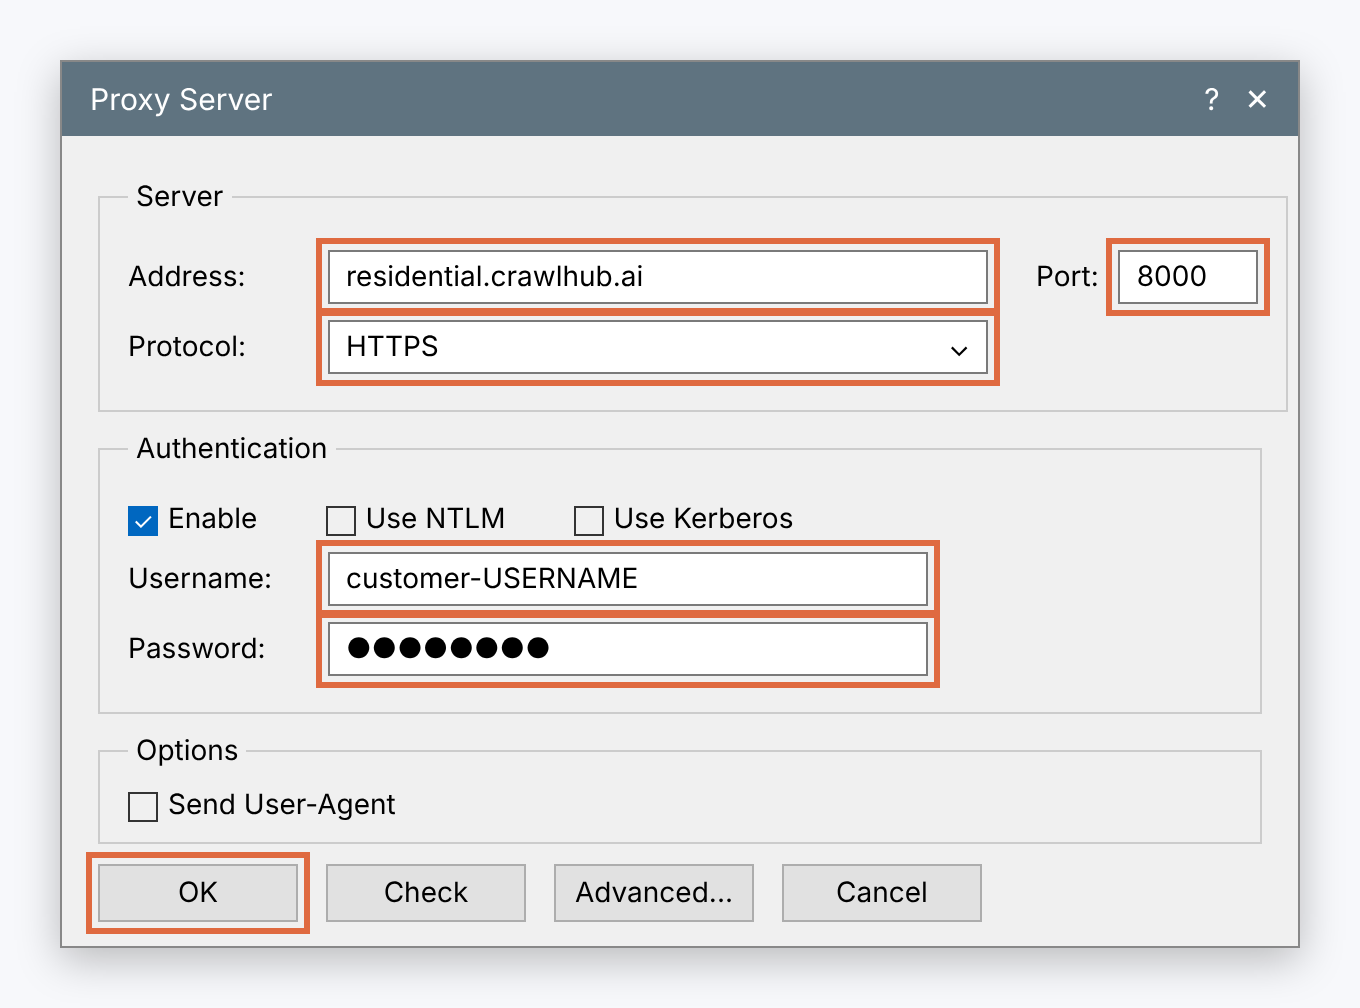
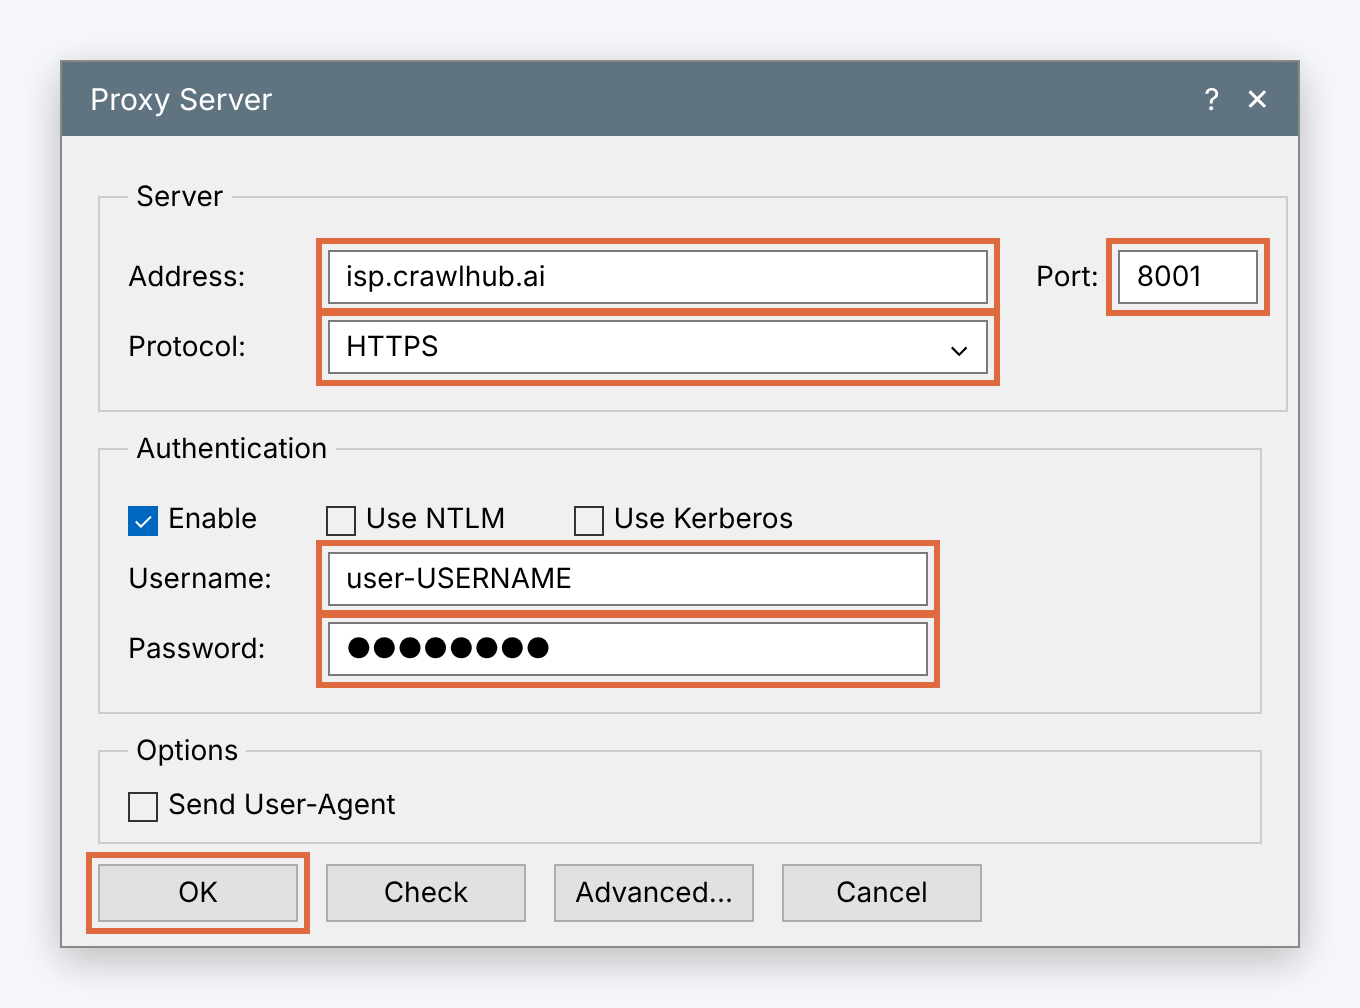
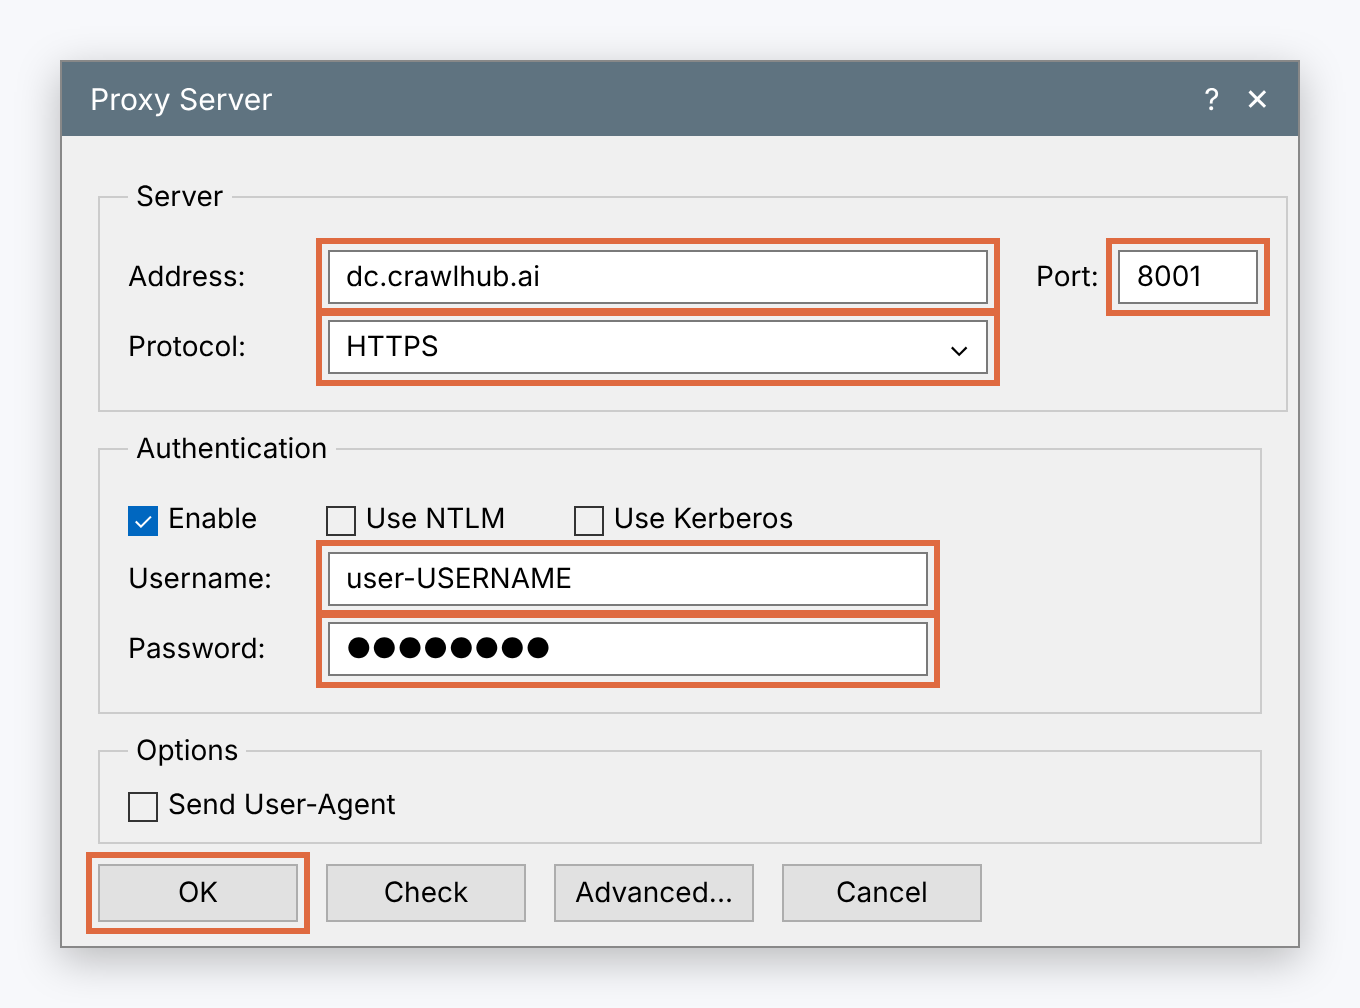
Open Profile → Proxy Servers or the corresponding toolbar control, then choose Add. Enter the assigned Address and Port.
Select HTTPS for an HTTP proxy that supports CONNECT, or SOCKS Version 5 for an assigned SOCKS5 endpoint. Proxifier’s HTTPS label describes CONNECT capability; it is not proof that the connection to the proxy itself uses TLS. Match the service’s compatible host and port.
Enable Authentication, enter the full raw proxy username and password, and save. Use Check to verify the connection before building a routing rule.
| Connection field | What to use |
|---|---|
| Hostname | Assigned proxy hostname or IP, without a URL path |
| Port | Assigned port for this endpoint and protocol |
| Username | Full assigned username, including any configured targeting/session values |
| Password | Proxy password, not the browser-tool account password |
3. Create an application rule
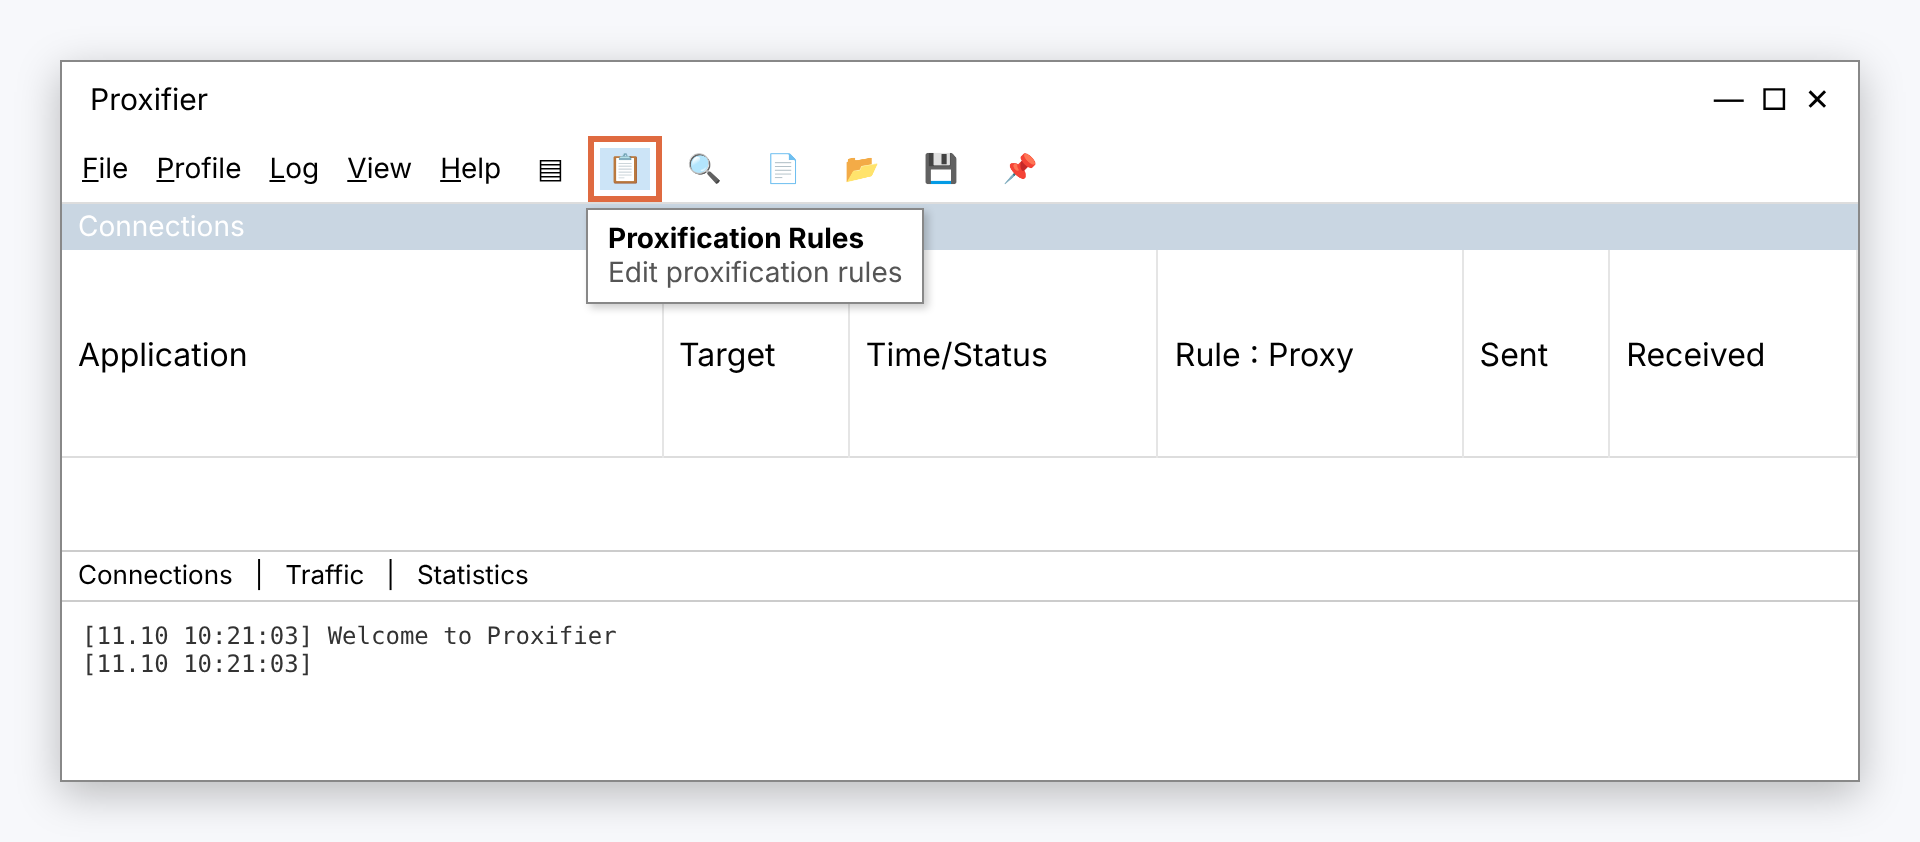
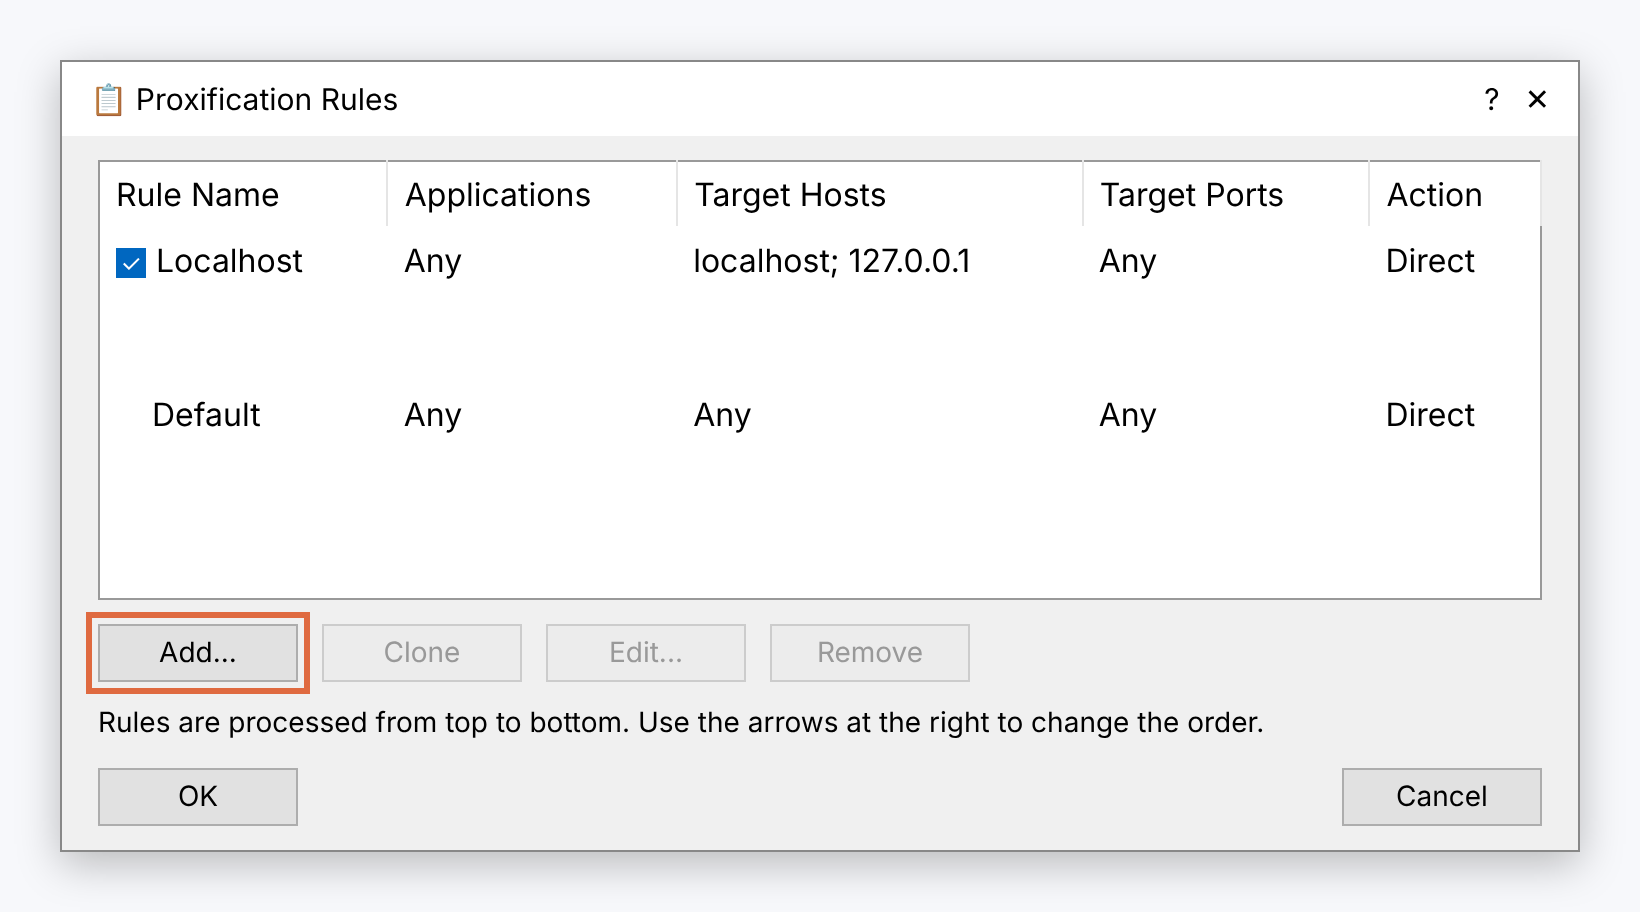
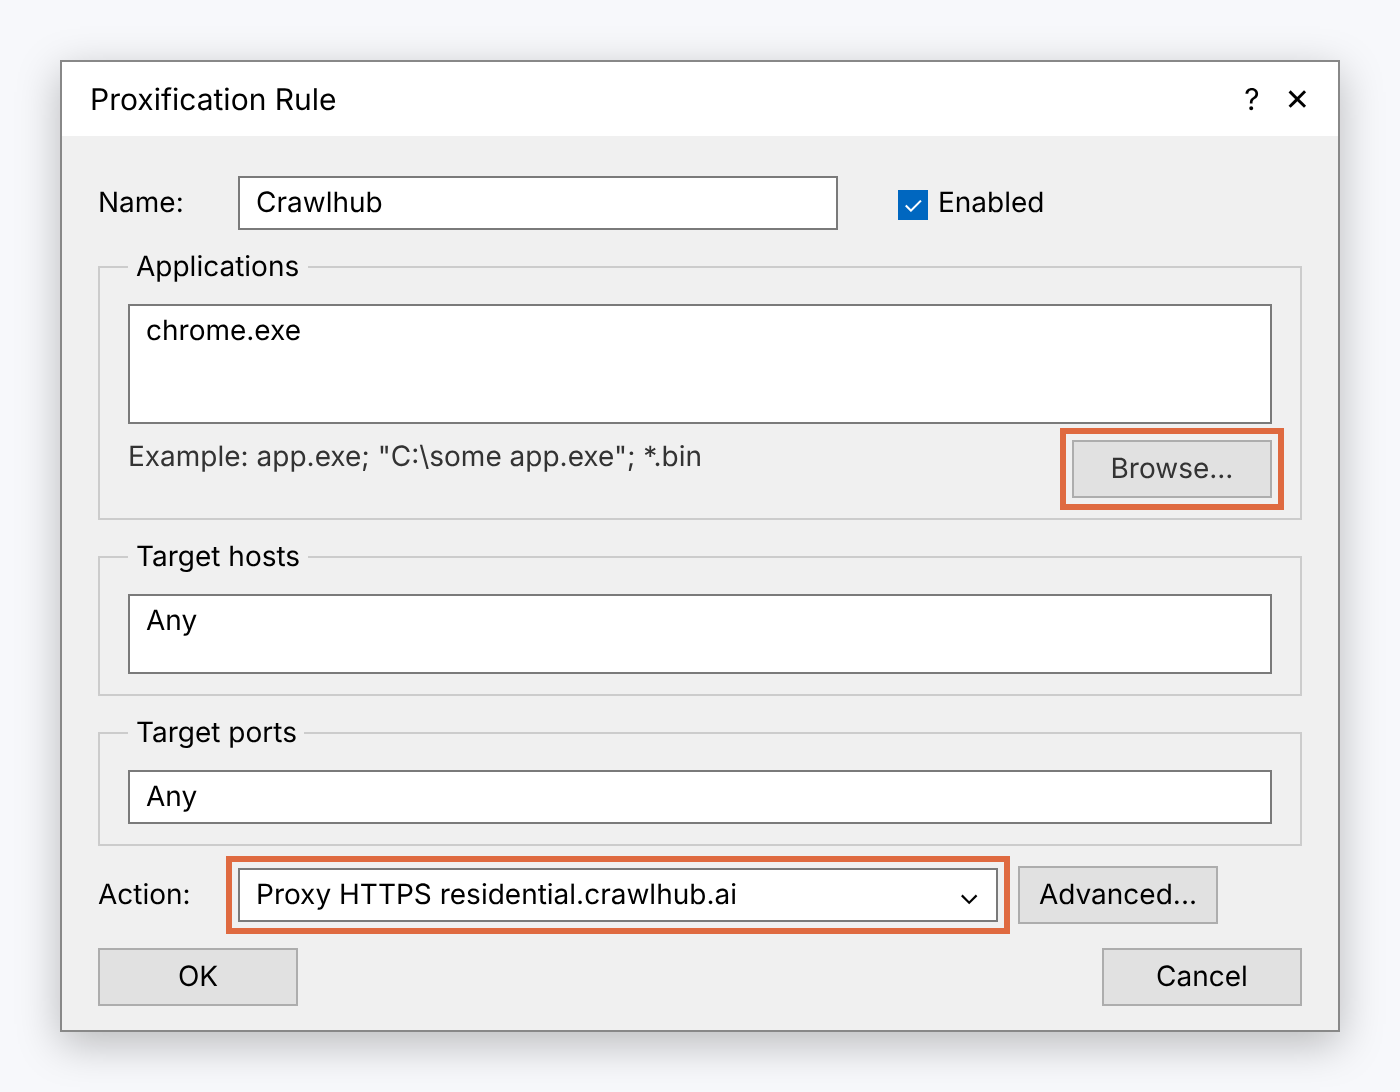
Open Proxification Rules, choose Add and name the rule. Use Browse to select the application, for example chrome.exe on Windows or the appropriate application on macOS.
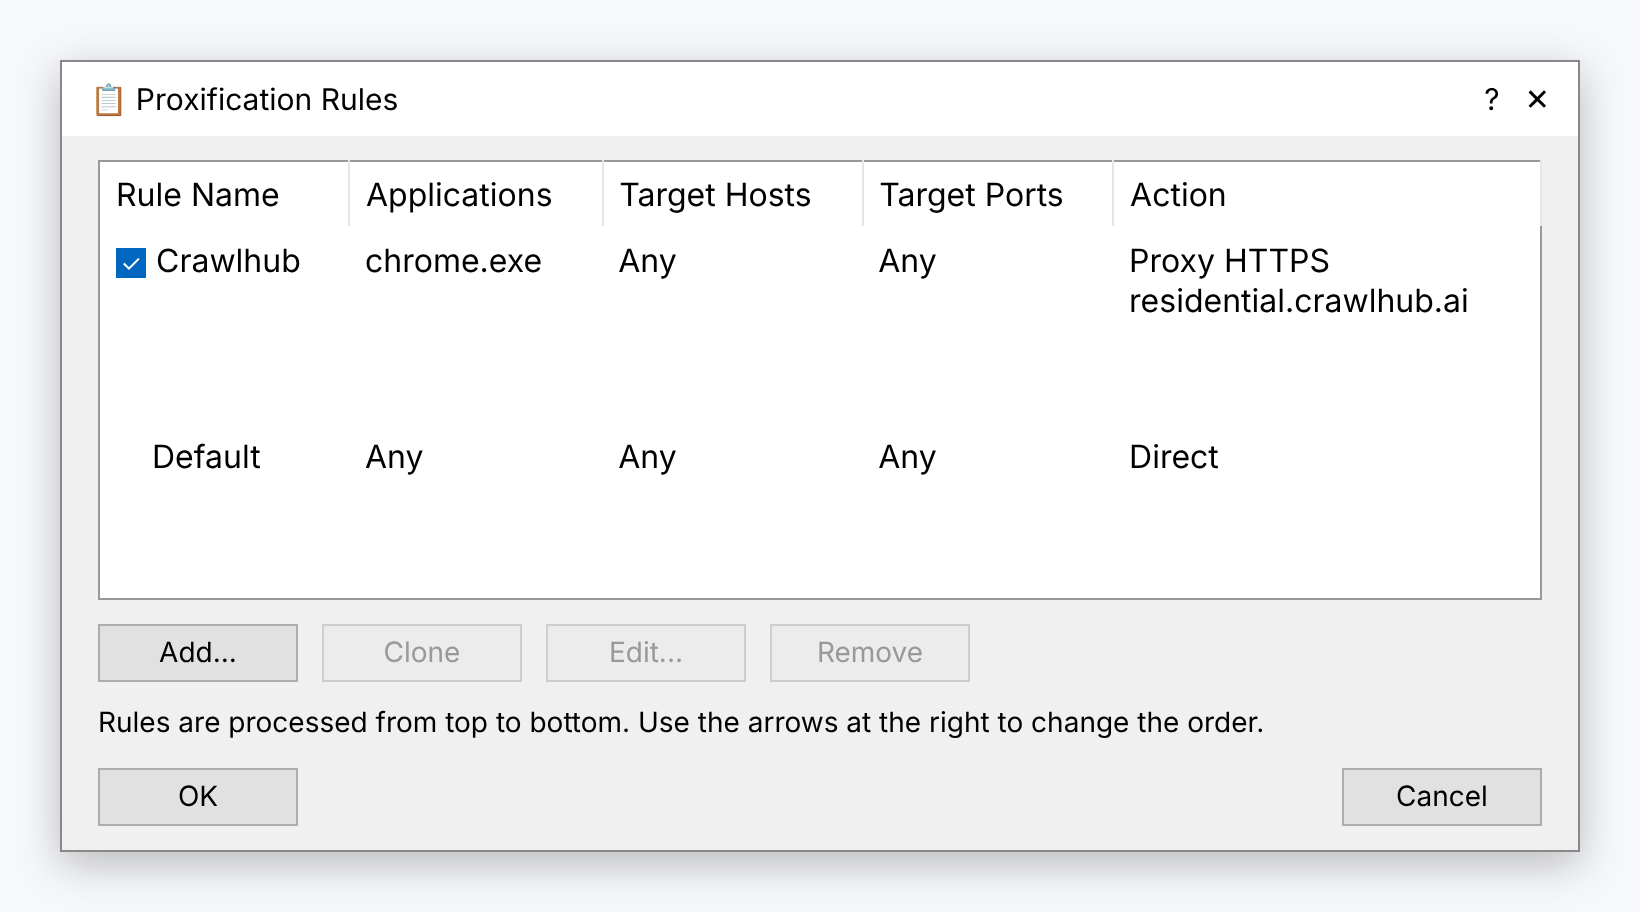
Set Action to the Crawlhub proxy and save. Rules are evaluated from top to bottom. Keep the Localhost bypass unless your design specifically needs loopback routing.
The Default rule handles connections that match no earlier rule. Leave its Action as Direct when you only want the selected application to use the proxy.
4. Run and inspect the application
Start the selected application and inspect its entries in Proxifier’s connection log. Verify that its rule and proxy are actually selected.
For a browser or HTTP client, open an IP-check destination from that app. Check DNS settings separately when name-resolution routing matters. Confirm the intended route before applying the rule to more applications.
Troubleshooting
App connects directly
Check whether an earlier rule or the Default action matches first, and verify the executable selected by the application rule.
Proxy works in a browser but not Proxifier
Confirm CONNECT support for the HTTPS protocol label, or use the assigned SOCKS5 protocol and port.
Connection loops or double routing
Review per-app manual proxies, the Localhost bypass and any rule that also intercepts the proxy client or its upstream connection.