Before you start
Use an activated connection and its assigned hostname, port, protocol, full username and proxy password. The proxy login is separate from the account used to sign in to the tool.
Use a version with Task Settings → Anti-blocking → Use my own proxies. Custom proxies are for local runs, not Octoparse Cloud. Do not enter HOST:PORT:USERNAME:PASSWORD into a field whose documented format is IP:port.
For password-authenticated upstream connections, install a supported Node.js release and proxy-chain on the same device as Octoparse. The extraction workflow remains no-code; the proxy bridge runs as a local process.
What is Octoparse?
Octoparse builds web scrapers through a point-and-click interface. Its current documentation limits custom proxies to local HTTP runs and does not support proxy usernames/passwords in the task’s proxy field.
- Point-and-click extraction
- Select page data and build the extraction workflow without writing scraper code.
- Task execution
- Run a configured task locally. Cloud proxy support is a separate built-in service.
- Custom HTTP route
- Use a compatible HTTP IP:port entry, or the local bridge supplied below for an authenticated upstream.
- Supported exports
- Export the results in the formats available in your version and plan, such as Excel or CSV.
1. Create a local task
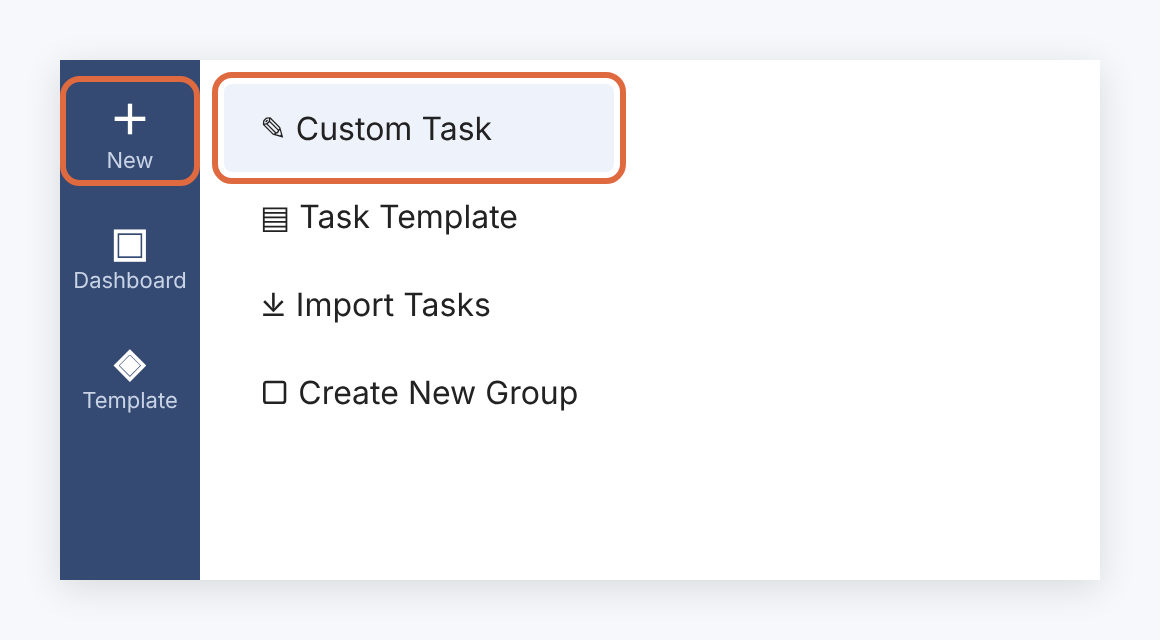
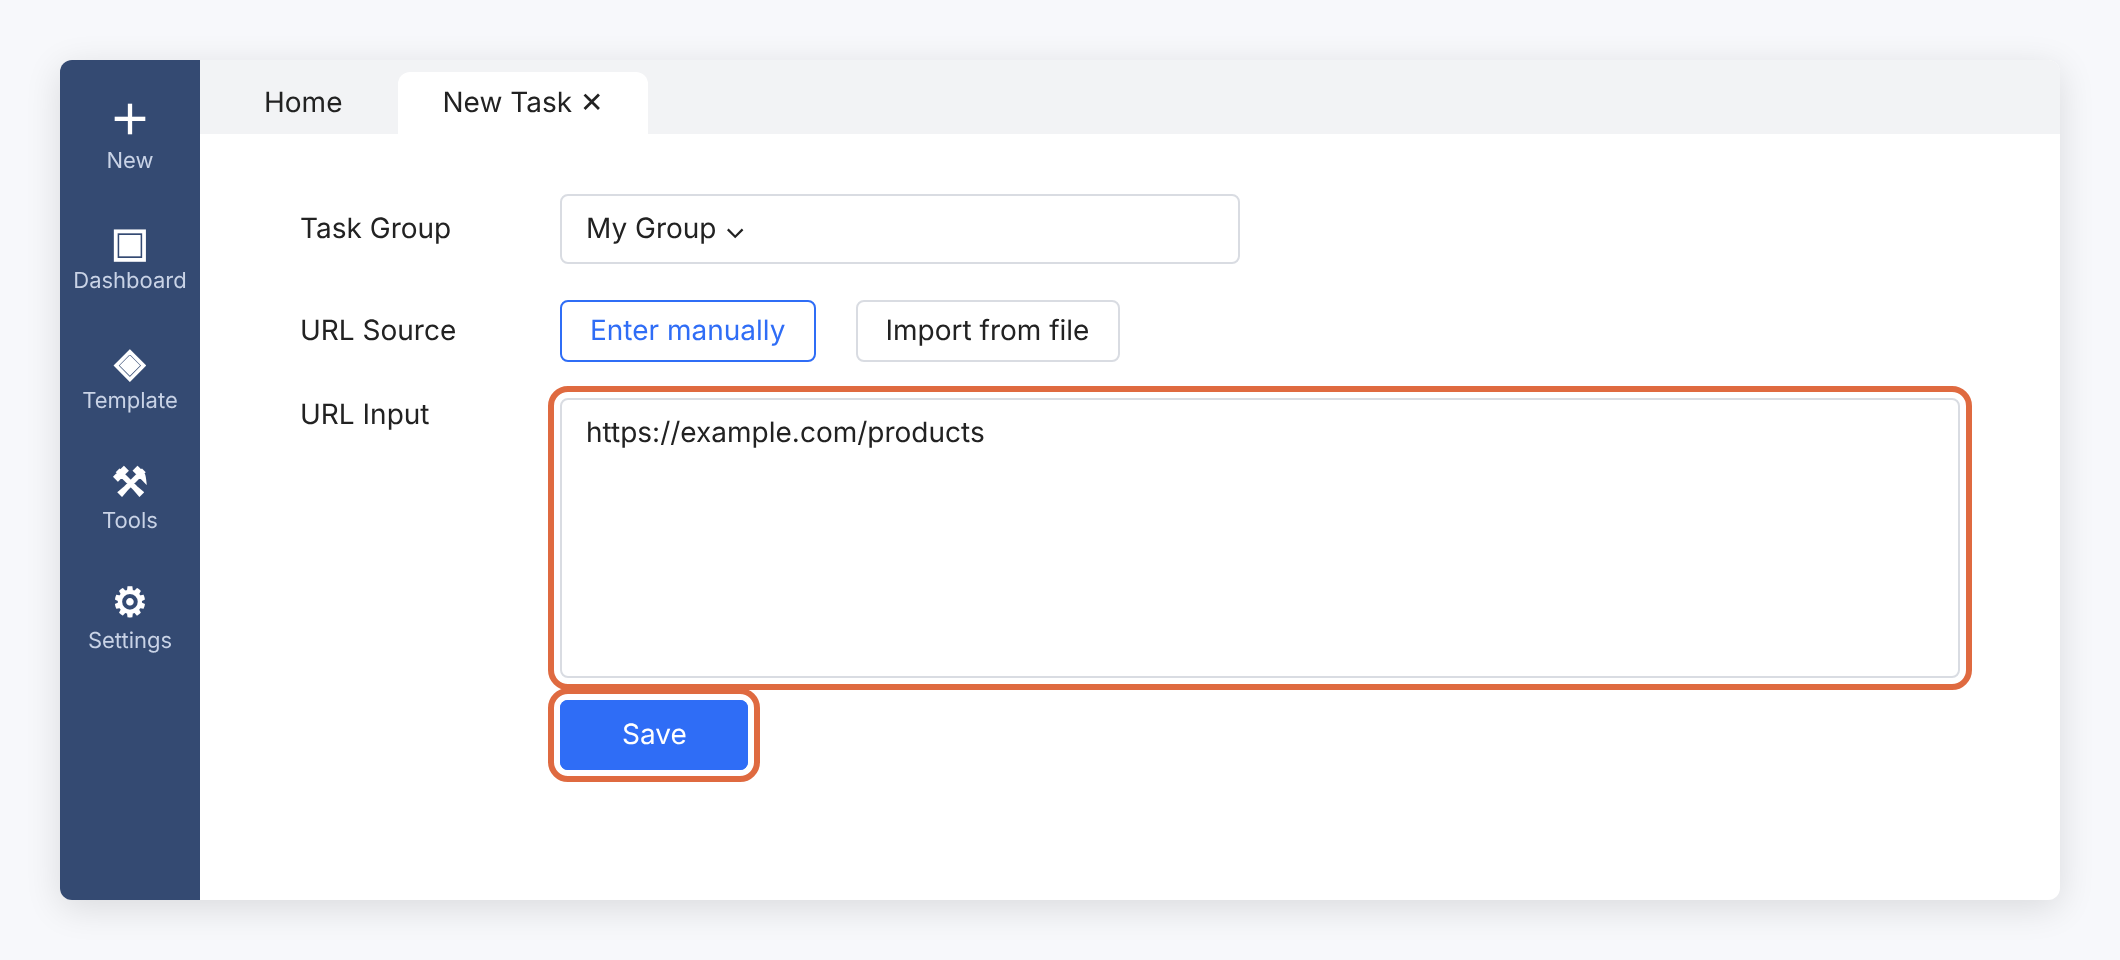
Install and open Octoparse. Choose New → Custom Task, enter an allowed target URL and save.
Start with a small page and one extraction goal before adding pagination or schedules.
2. Prepare the authenticated connection
For a proxy that needs login credentials, save both helper files below in one project folder. Install proxy-chain and start octoparse_bridge.mjs with your assigned server, username and password in the environment.
The helper prints a local URL such as http://127.0.0.1:49152. Leave it running. Its port can change on restart. The local endpoint has no login, listens only on this device and forwards to the authenticated upstream.
If your assigned HTTP connection does not require authentication, use its documented compatible numeric IP:port directly instead of this bridge.
npm init -y
npm install proxy-chain
export PROXY_SERVER='http://YOUR_ASSIGNED_HOST:YOUR_PORT'
export PROXY_USERNAME='YOUR_ASSIGNED_USERNAME'
export PROXY_PASSWORD='YOUR_PROXY_PASSWORD'
node octoparse_bridge.mjsimport { Server } from 'proxy-chain';
export async function createProxyBridge() {
const { PROXY_SERVER, PROXY_USERNAME, PROXY_PASSWORD } = process.env;
if (!PROXY_SERVER || !PROXY_USERNAME || !PROXY_PASSWORD) {
throw new Error('Set PROXY_SERVER, PROXY_USERNAME and PROXY_PASSWORD.');
}
const upstream = new URL(PROXY_SERVER);
if (!['http:', 'https:'].includes(upstream.protocol) ||
upstream.username || upstream.password || upstream.search ||
upstream.hash || (upstream.pathname && upstream.pathname !== '/')) {
throw new Error('Use an HTTP(S) proxy server URL without credentials, a path or a query.');
}
upstream.username = PROXY_USERNAME;
upstream.password = PROXY_PASSWORD;
const server = new Server({
host: '127.0.0.1',
port: 0,
prepareRequestFunction: () => ({ upstreamProxyUrl: upstream.href }),
});
await server.listen();
return {
url: `http://127.0.0.1:${server.port}`,
close: () => server.close(true),
};
}import { createProxyBridge } from './proxy_bridge.mjs';
const bridge = await createProxyBridge();
console.log(bridge.url);
for (const signal of ['SIGINT', 'SIGTERM']) {
process.once(signal, async () => { await bridge.close(); process.exit(0); });
}3. Enable your own HTTP proxy
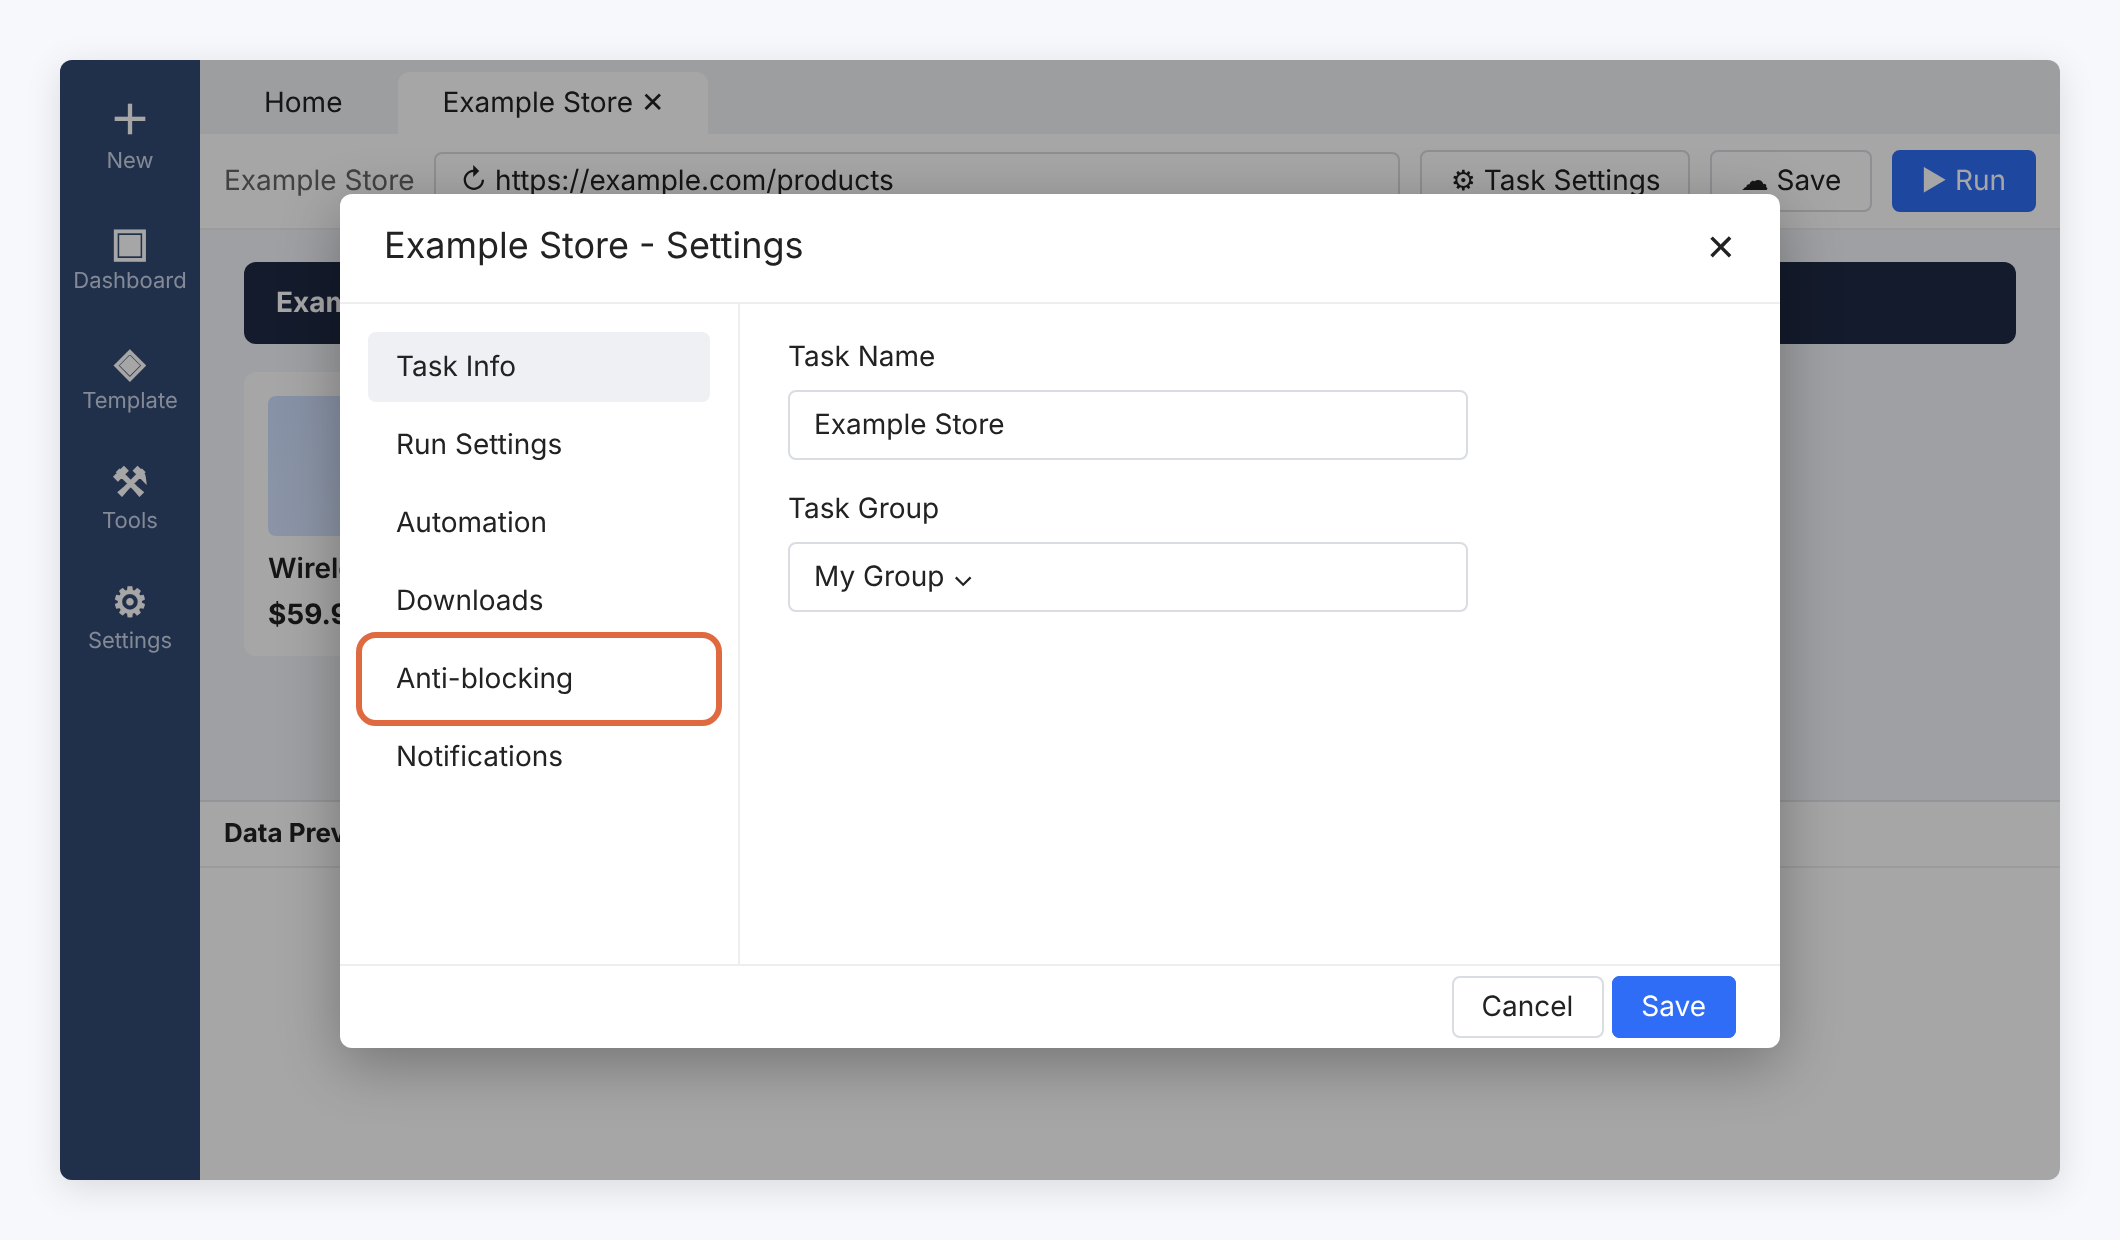
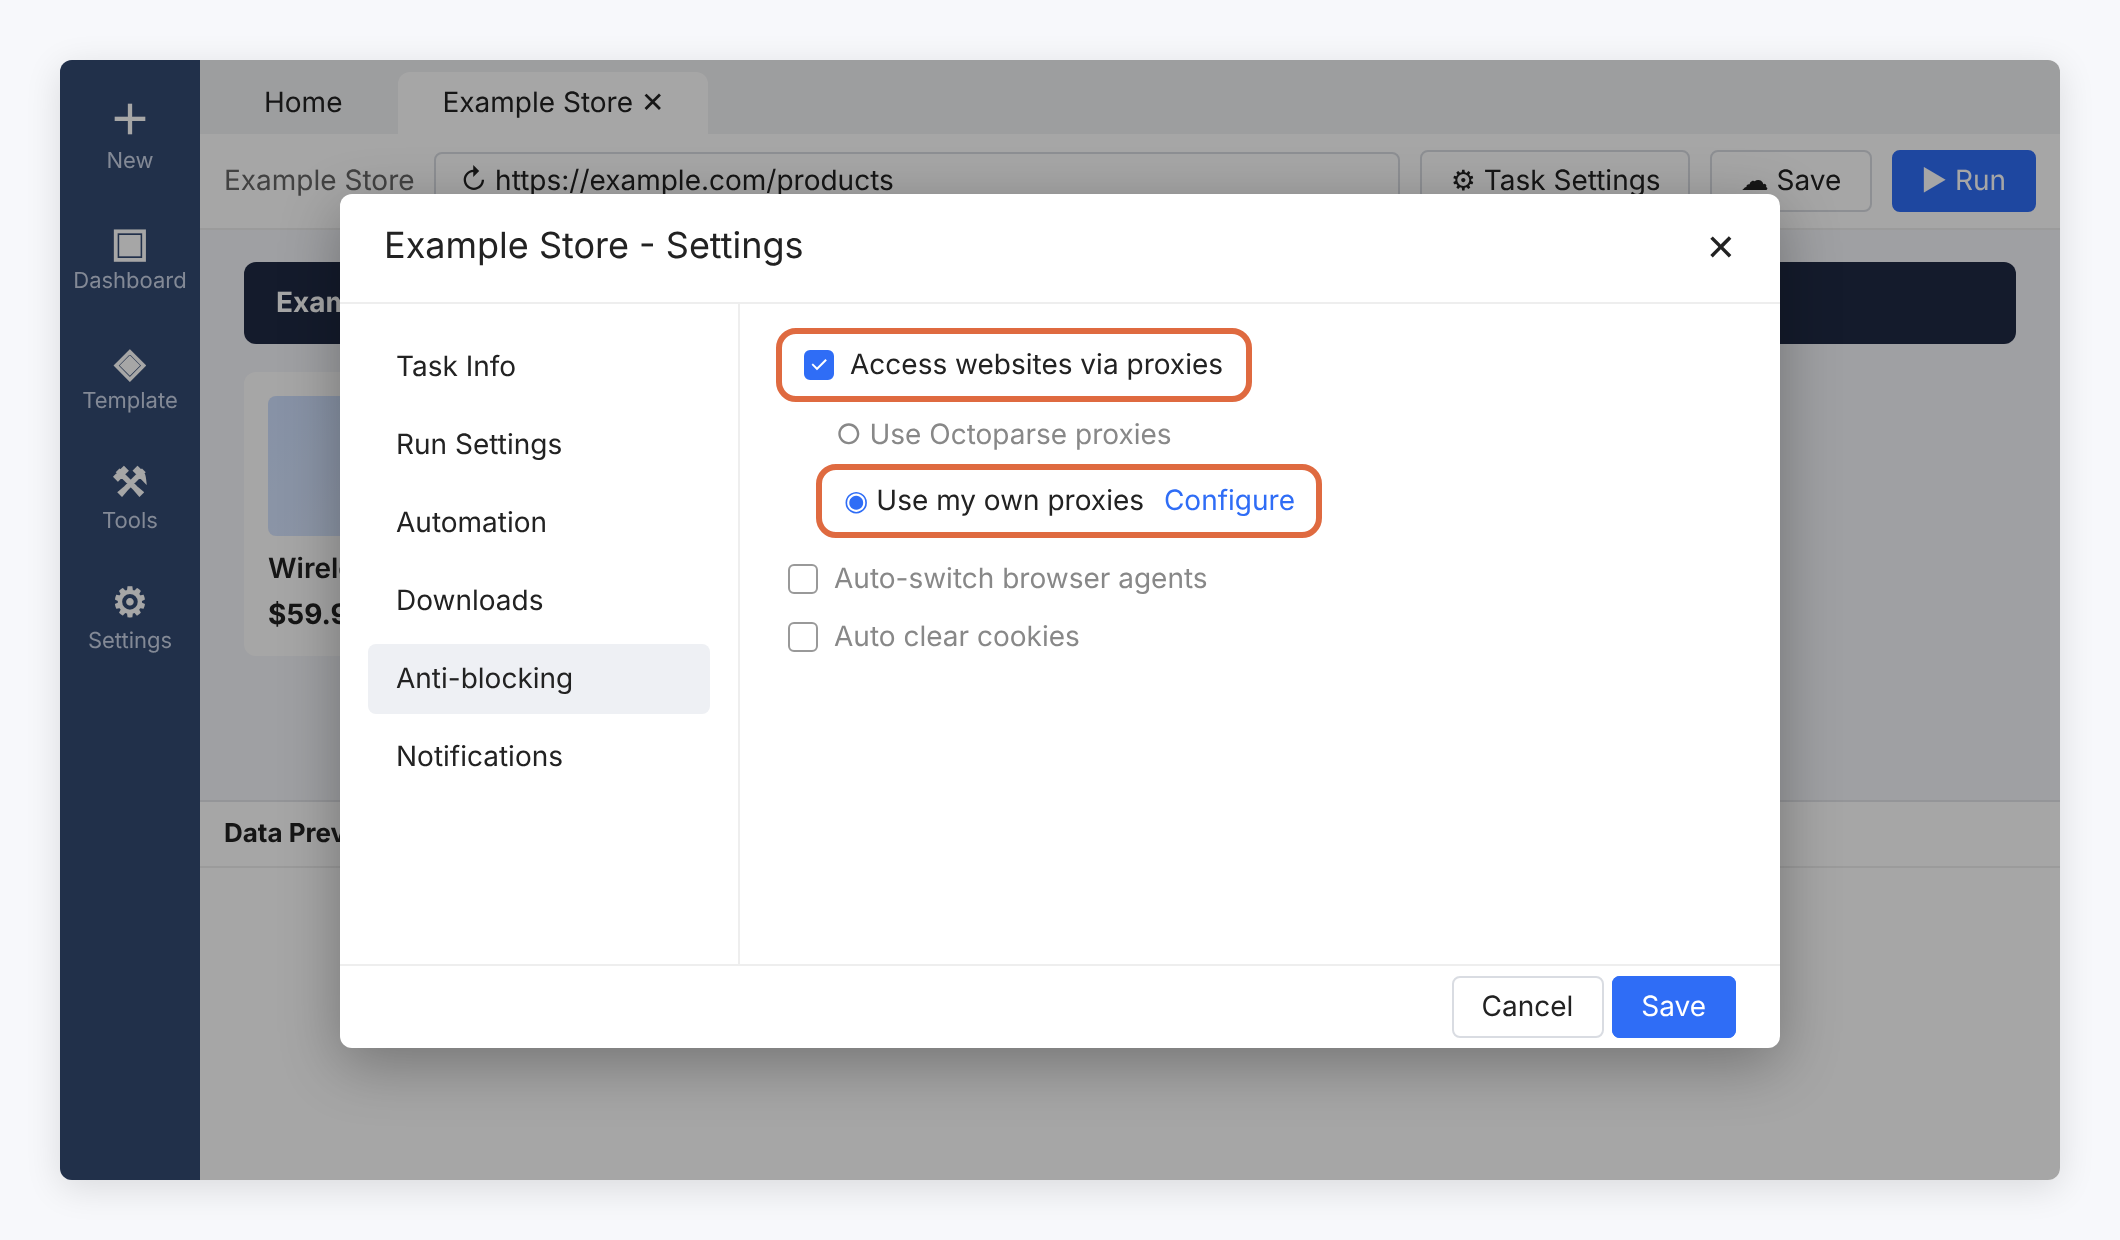
Open Task Settings → Anti-blocking. Enable Access website via proxies, choose Use my own proxies and open Configure.
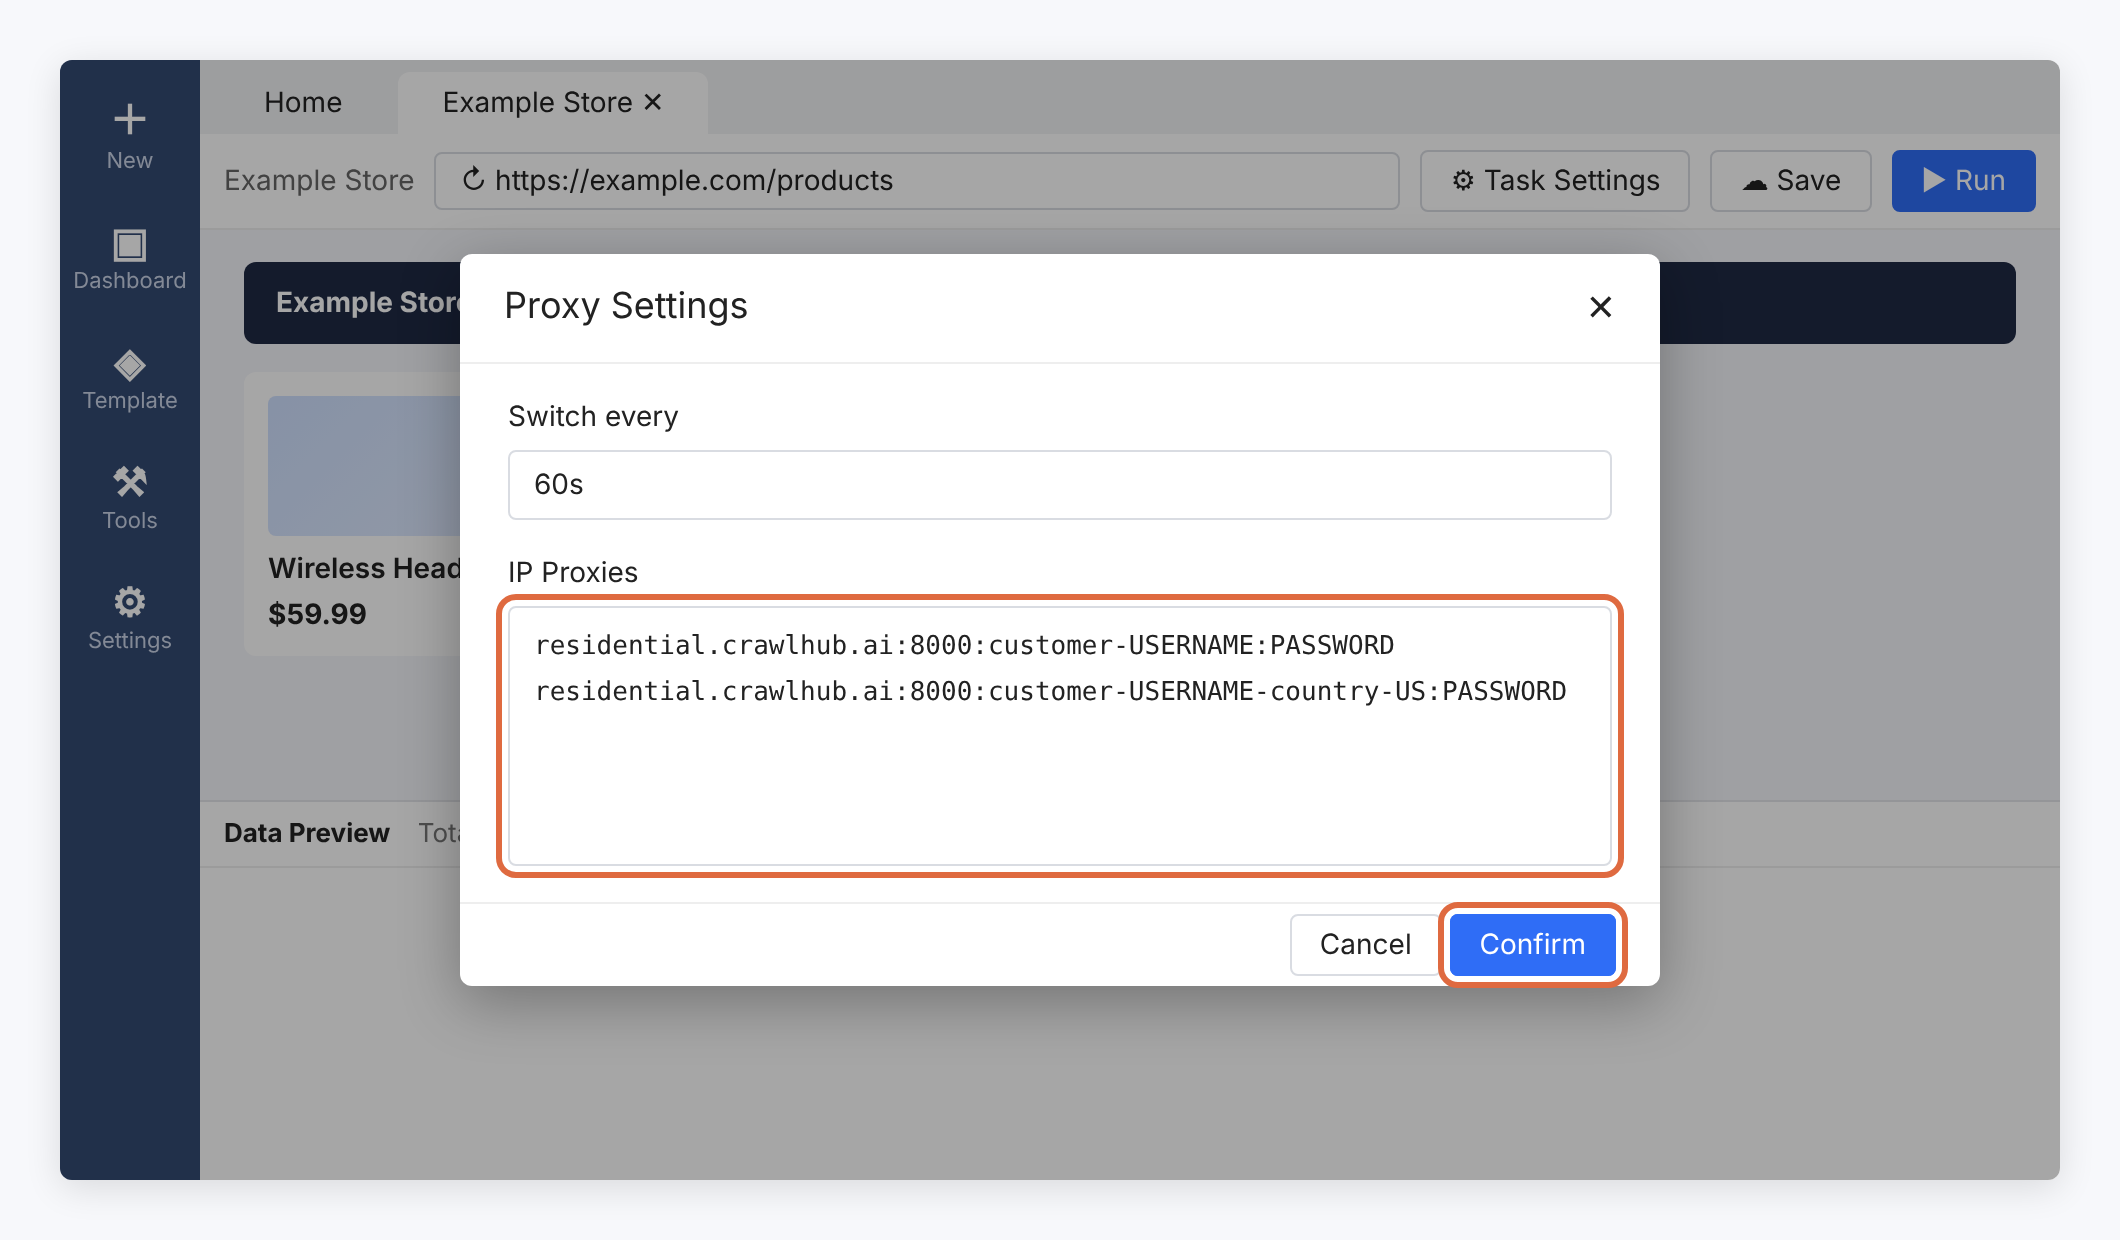
For the bridge, enter 127.0.0.1 followed by the actual printed port, one entry per line. Do not include the http:// prefix, upstream username or password in Octoparse’s IP:port field. Confirm and save.
Switch every rotates entries in Octoparse’s list. With a single bridge entry, it does not change the upstream IP or sticky-session lifetime. Upstream session/rotation settings are controlled by the connection you supplied.
Task-editing proxy settings are separate in current releases. Enable the intended editing proxy as well if the page must load through it while you configure the task.
127.0.0.1:PORT_PRINTED_BY_BRIDGE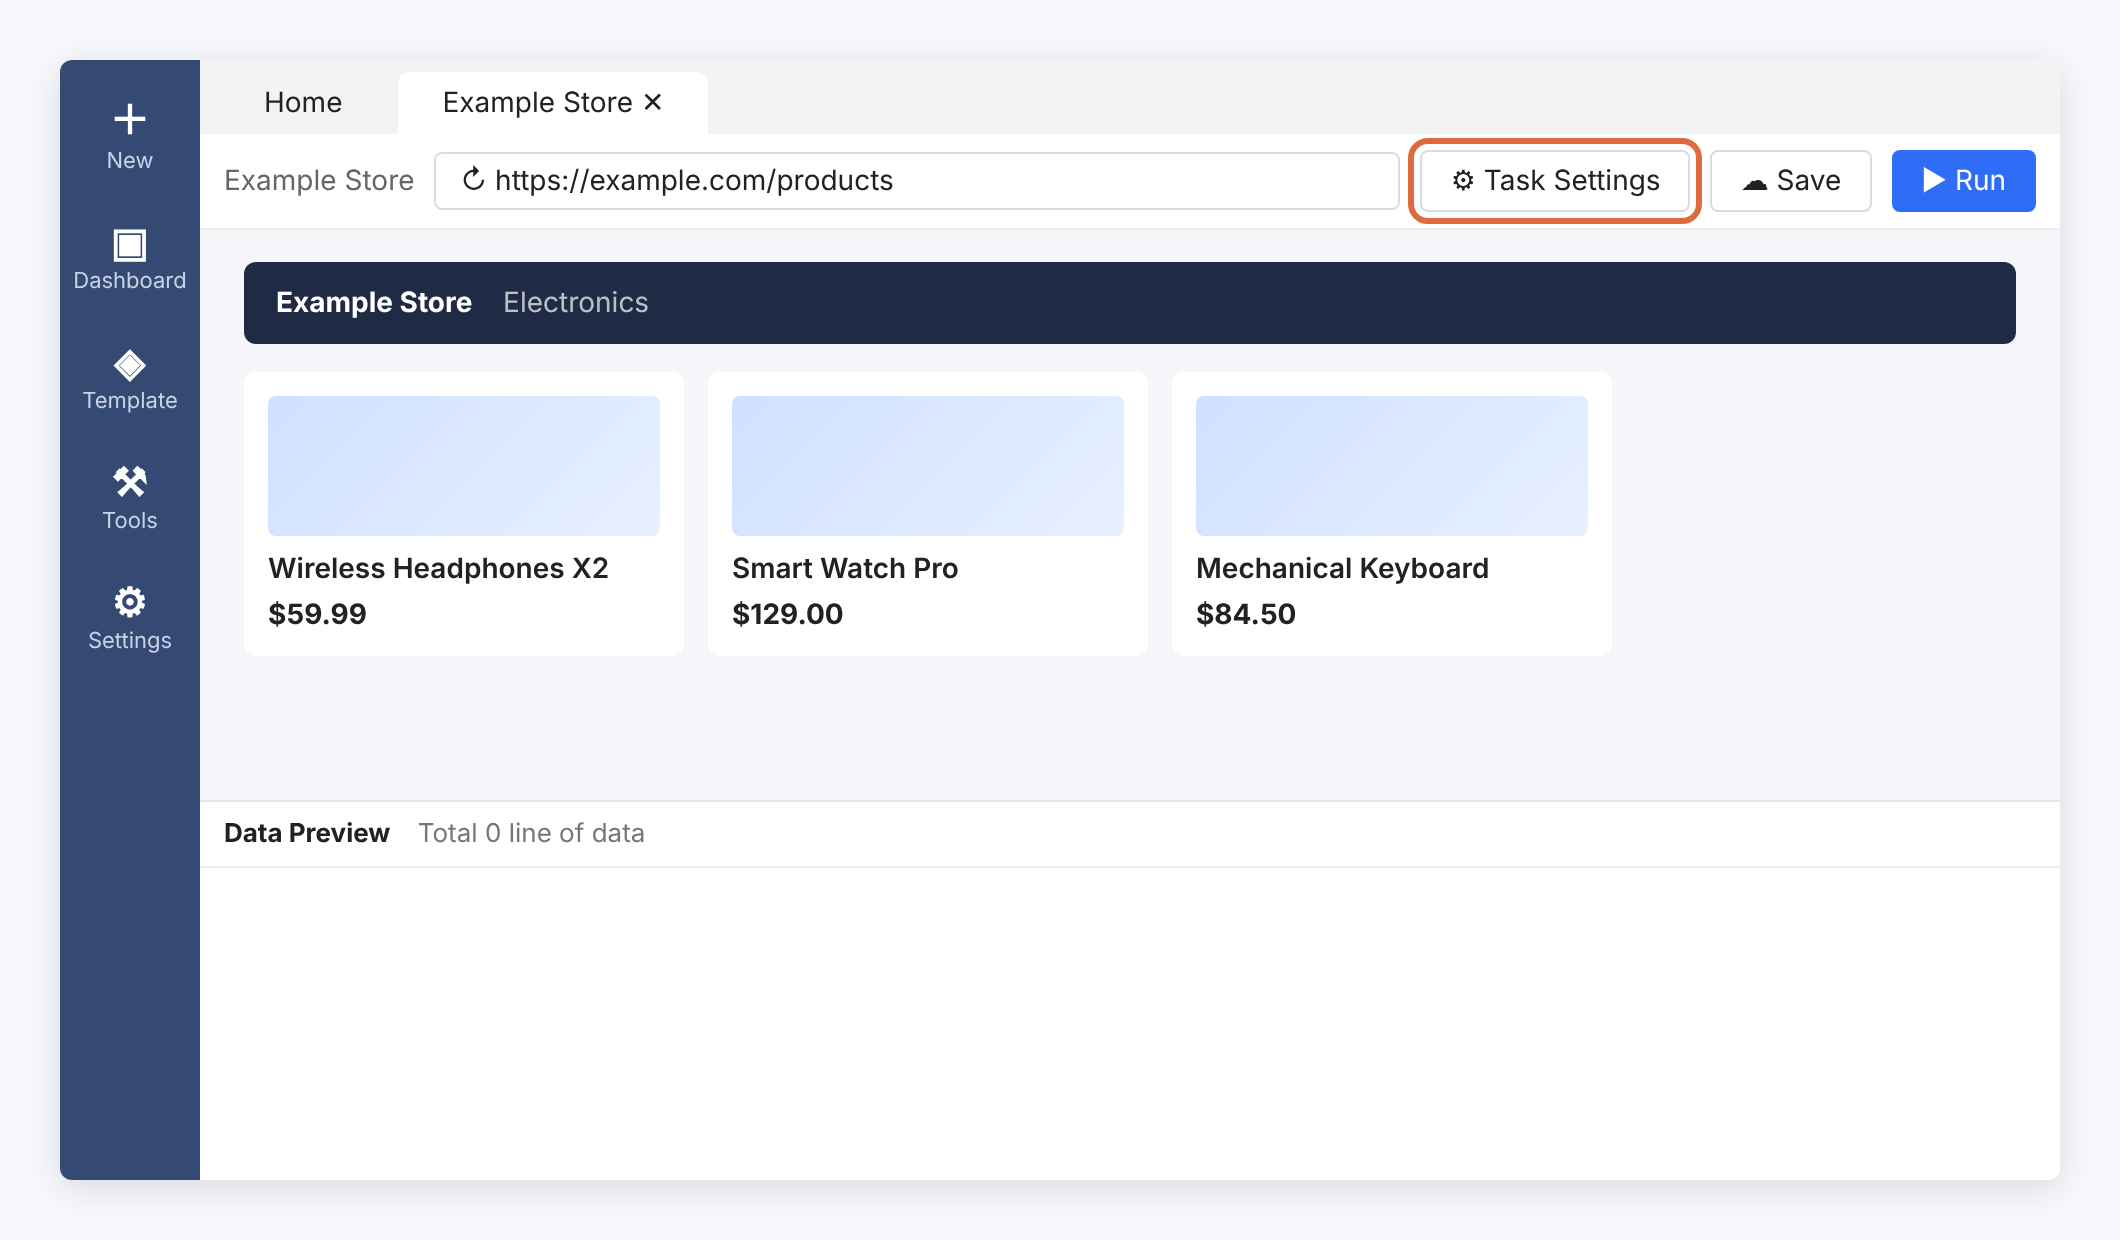
4. Build, run locally and export
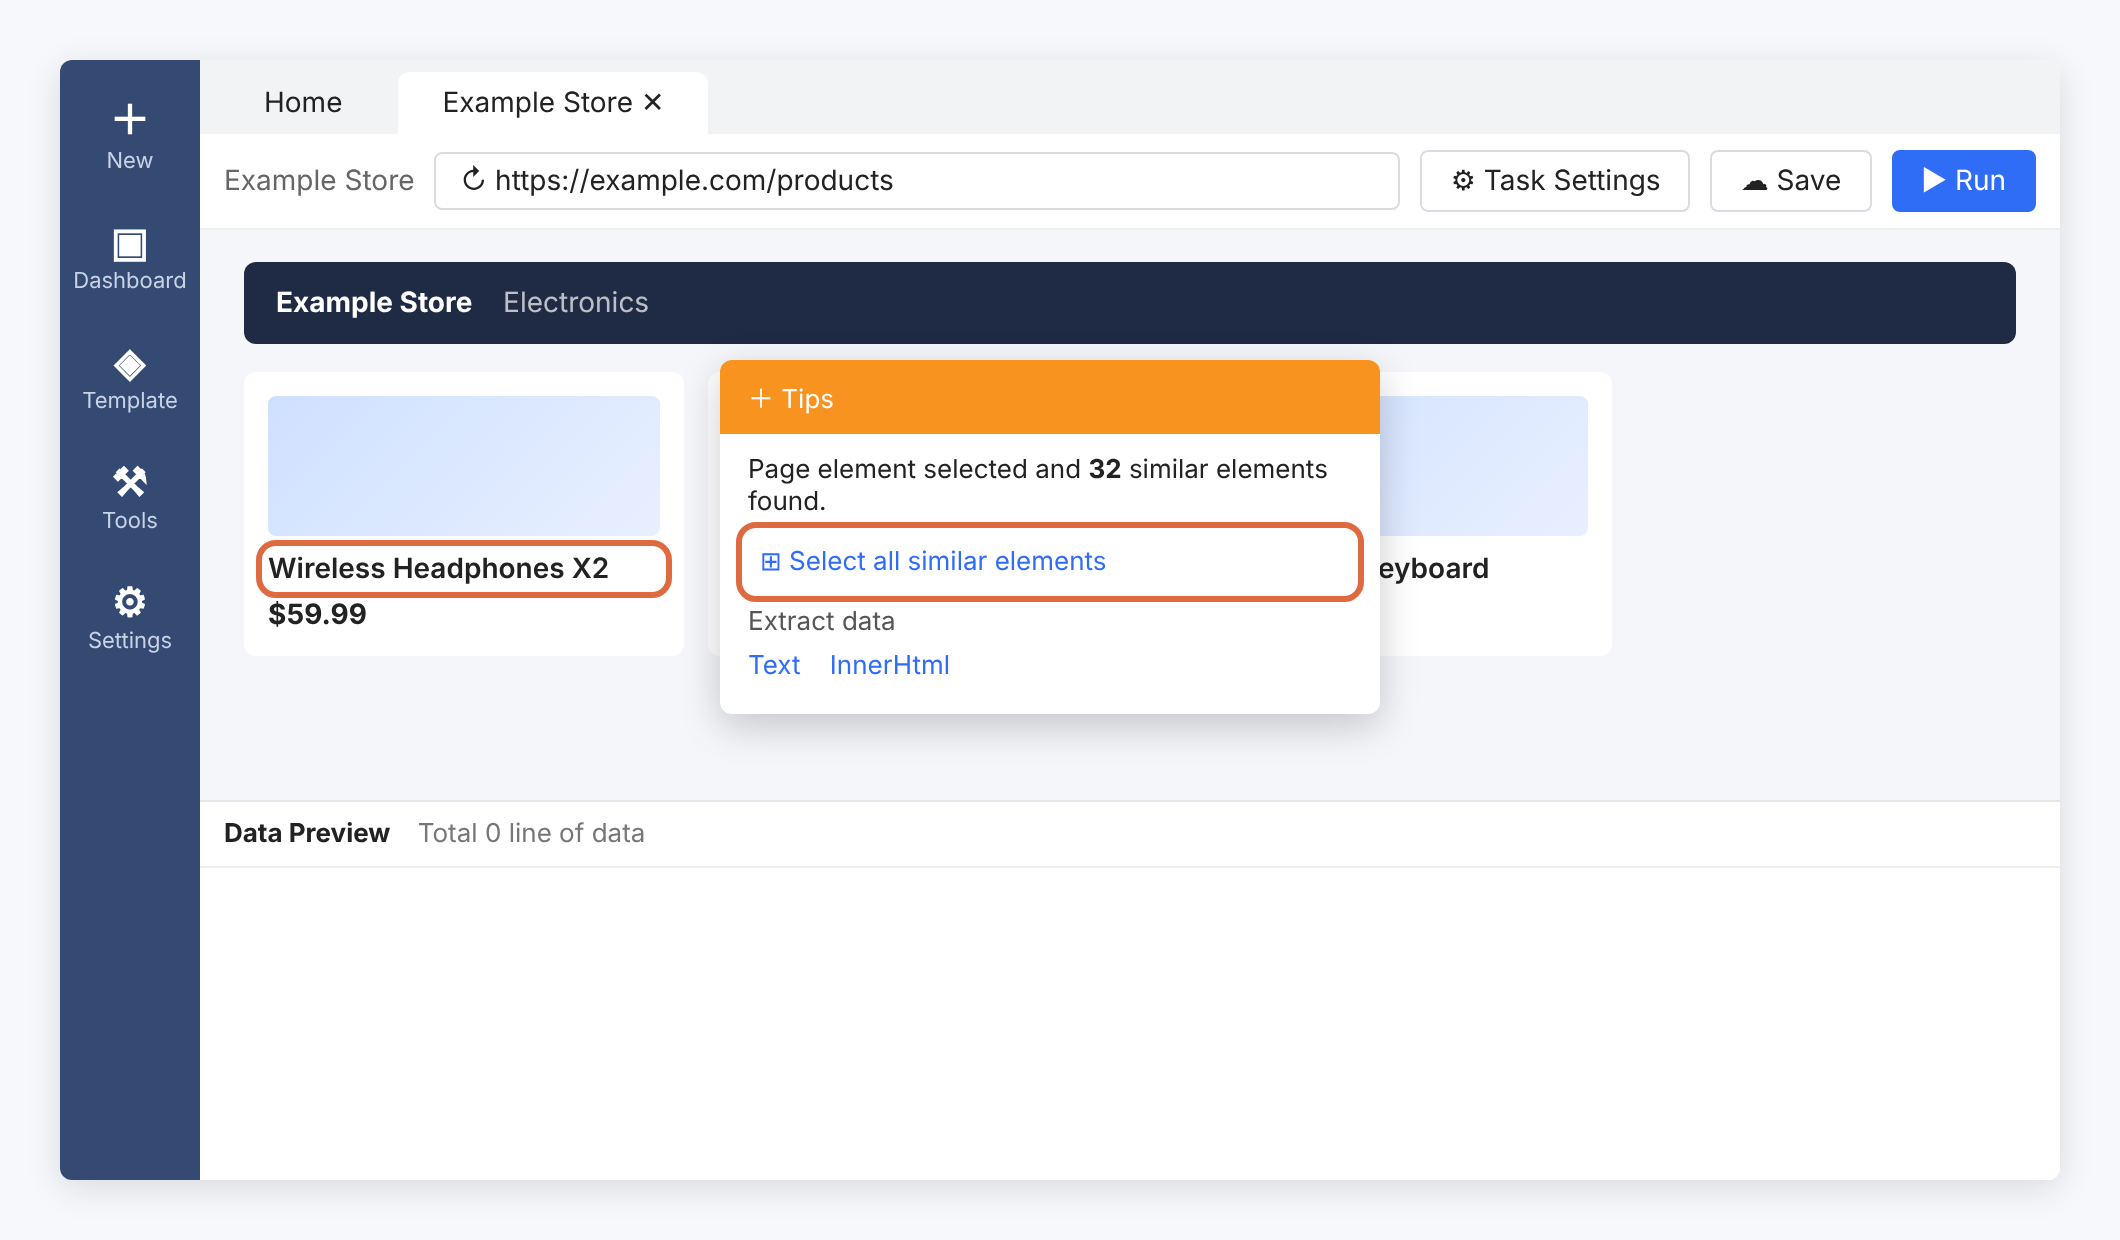
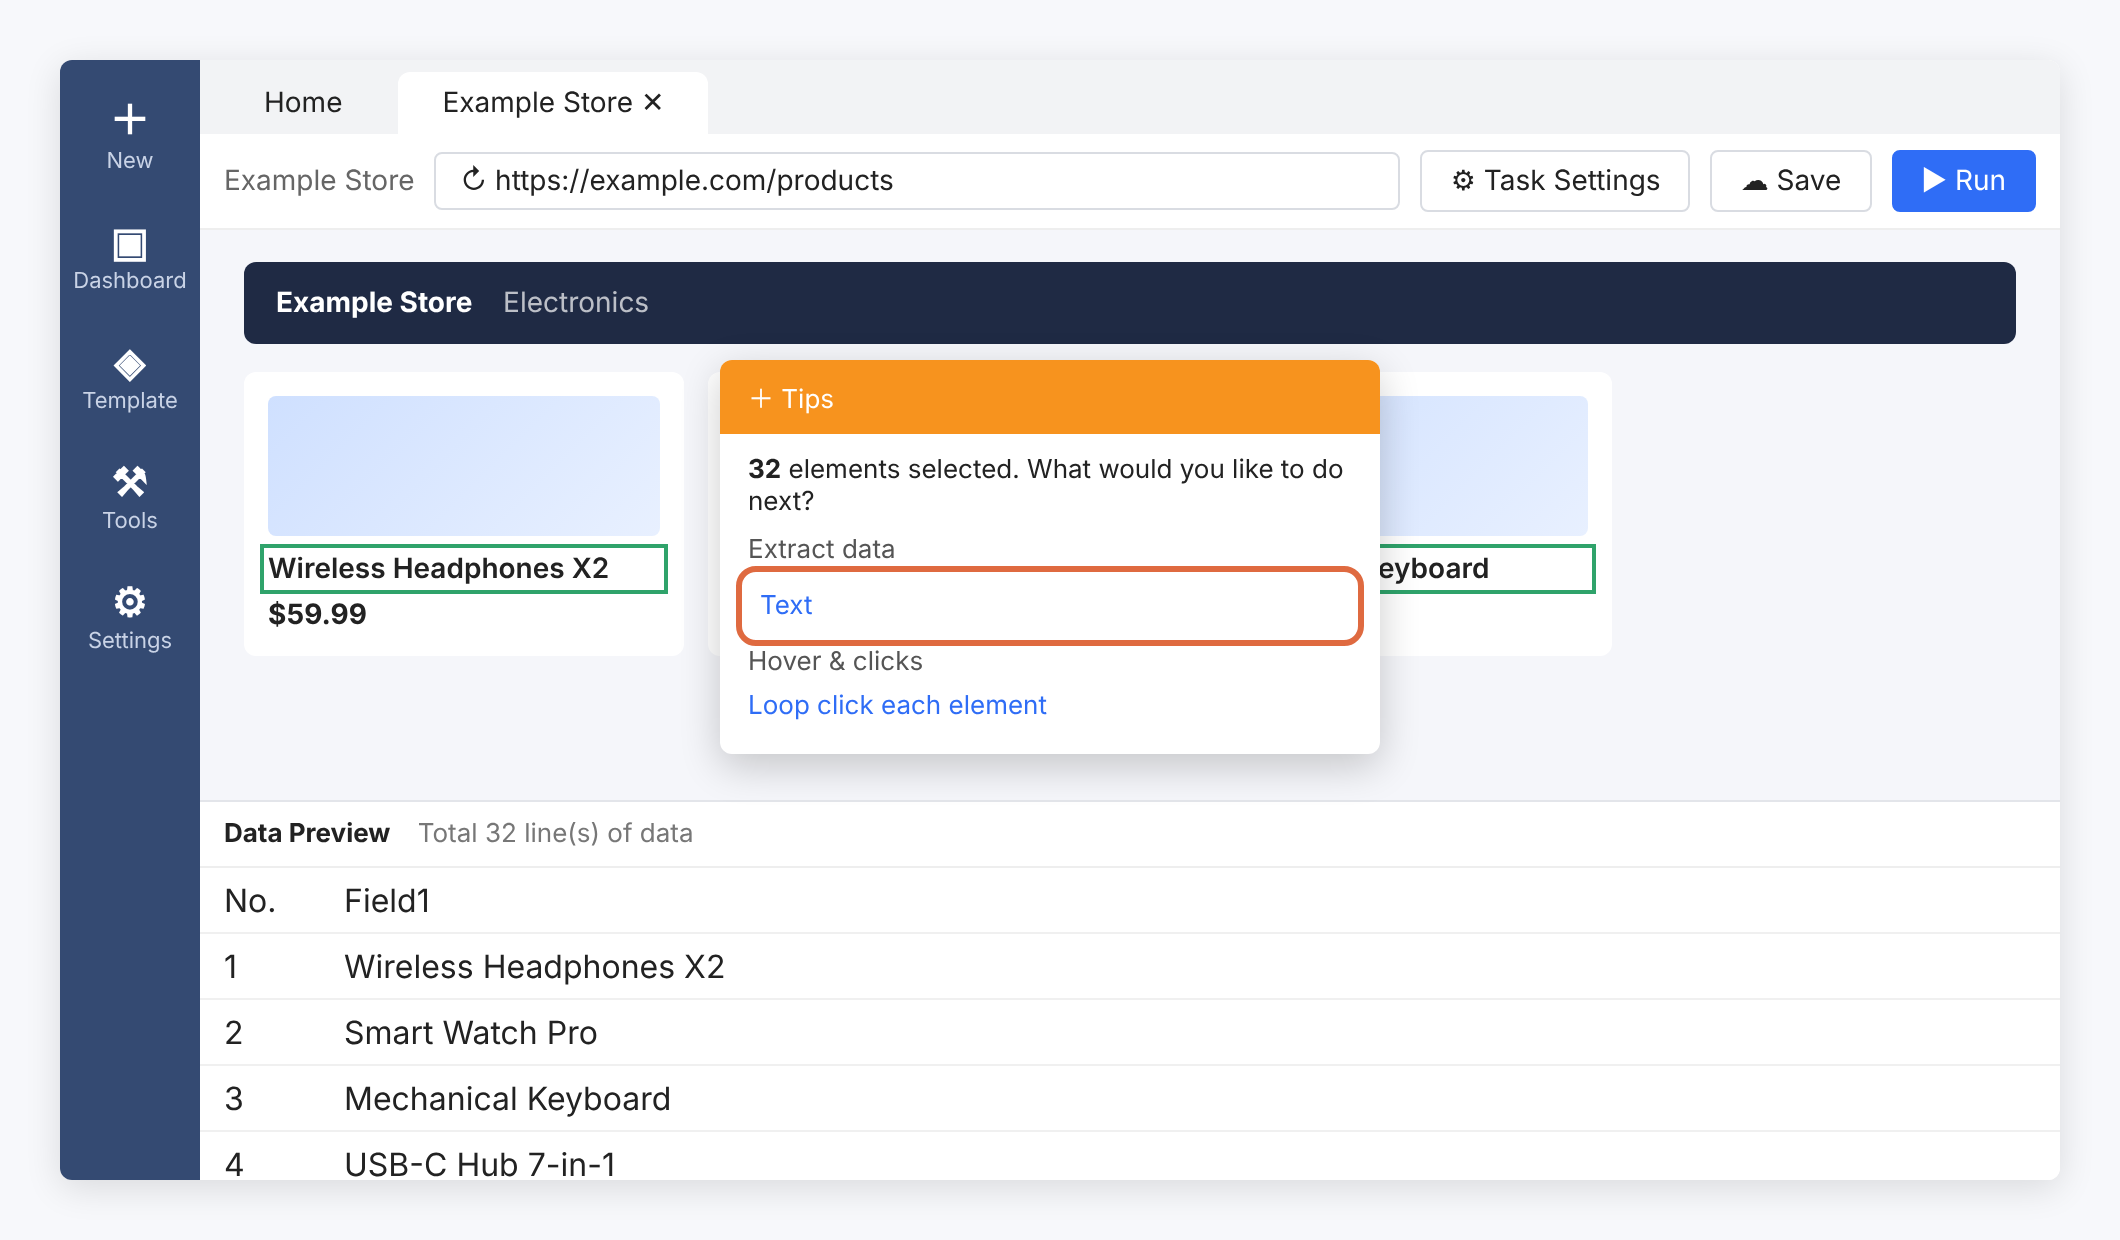
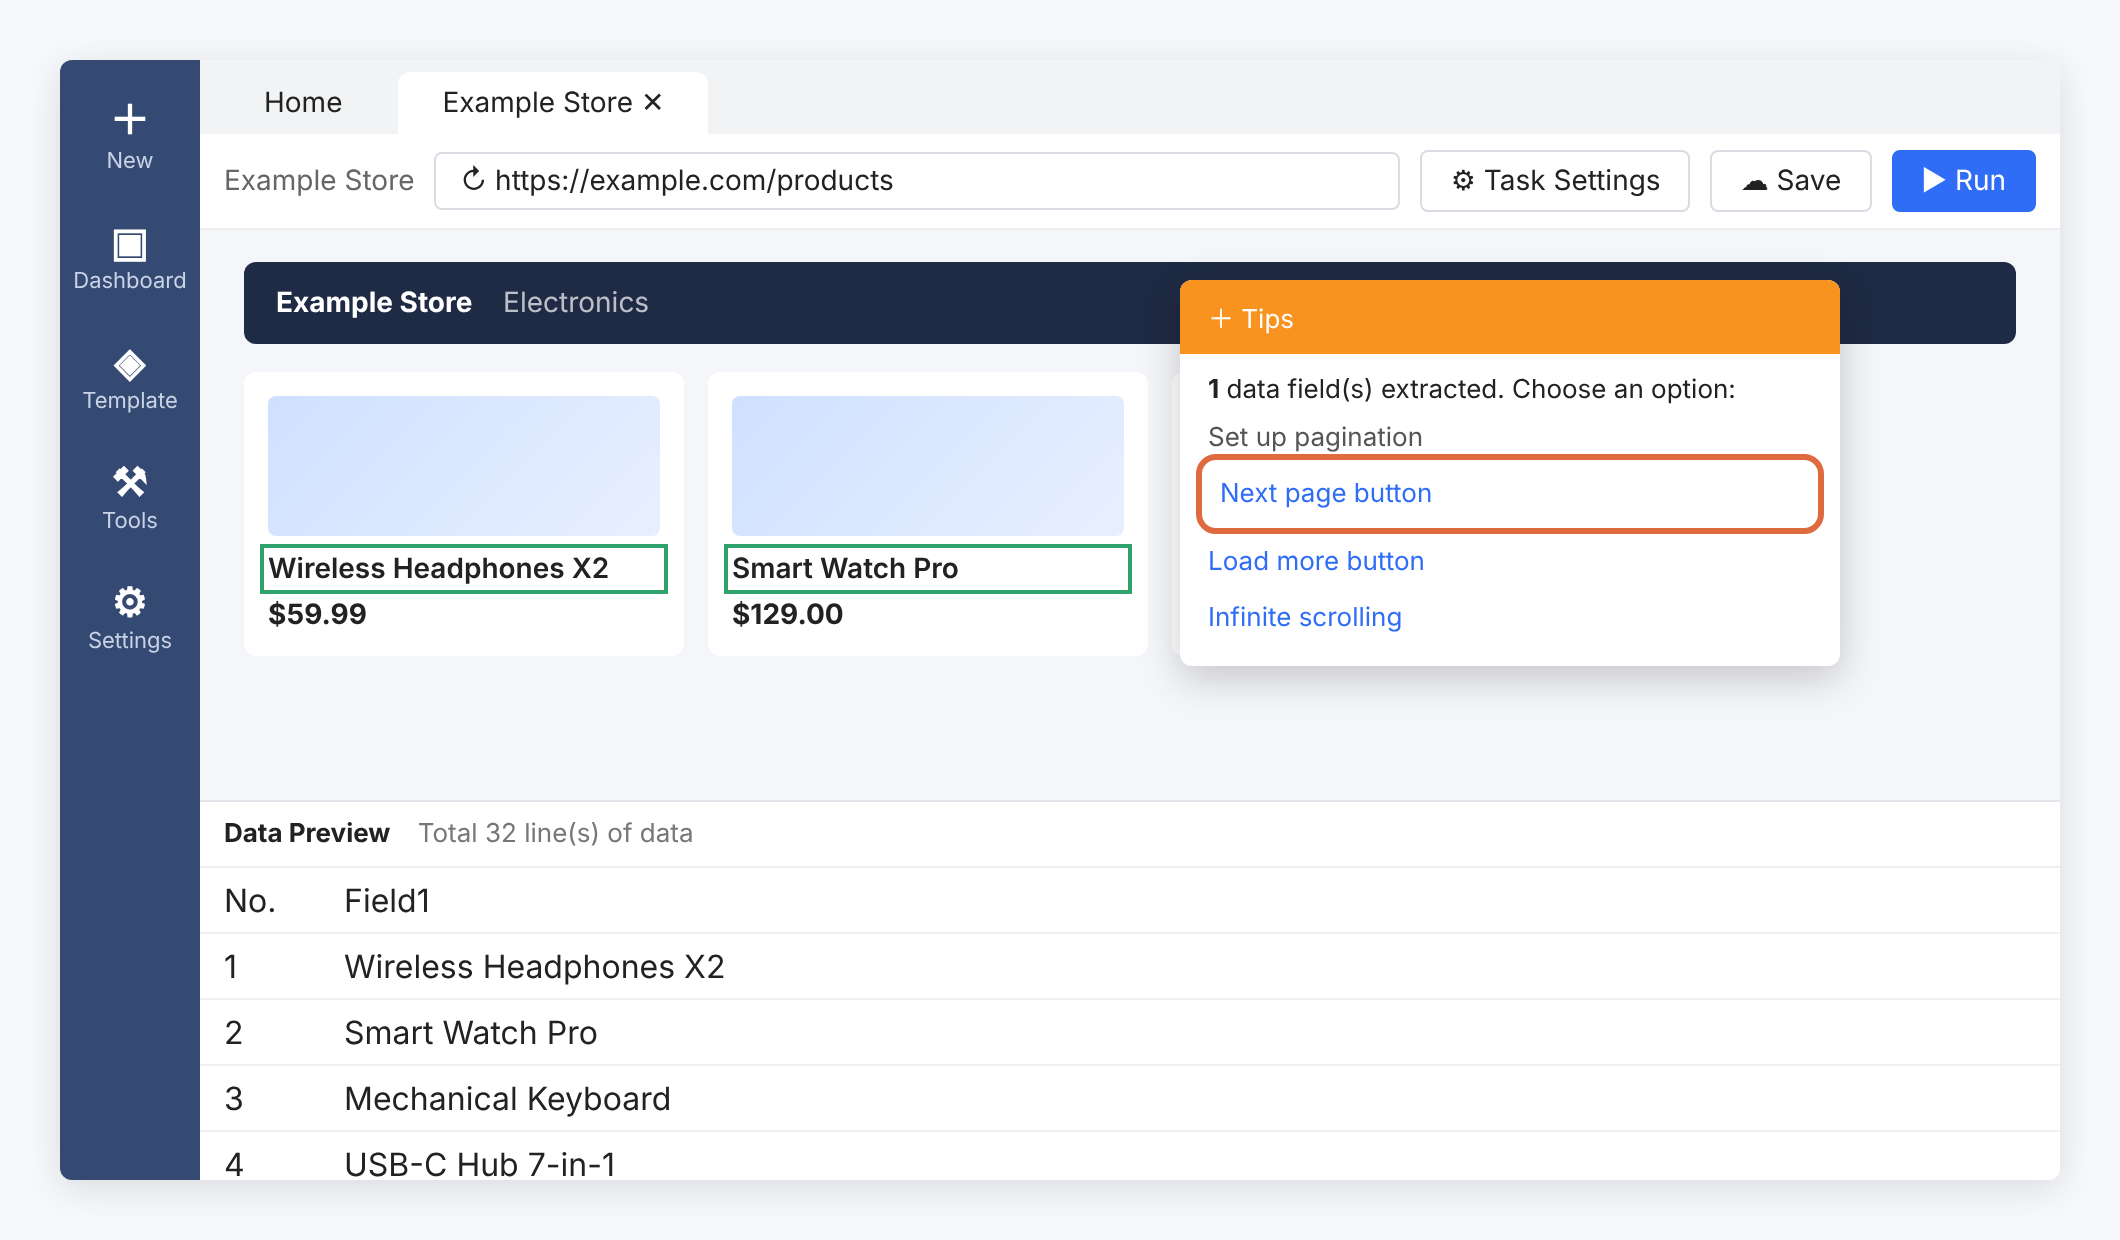
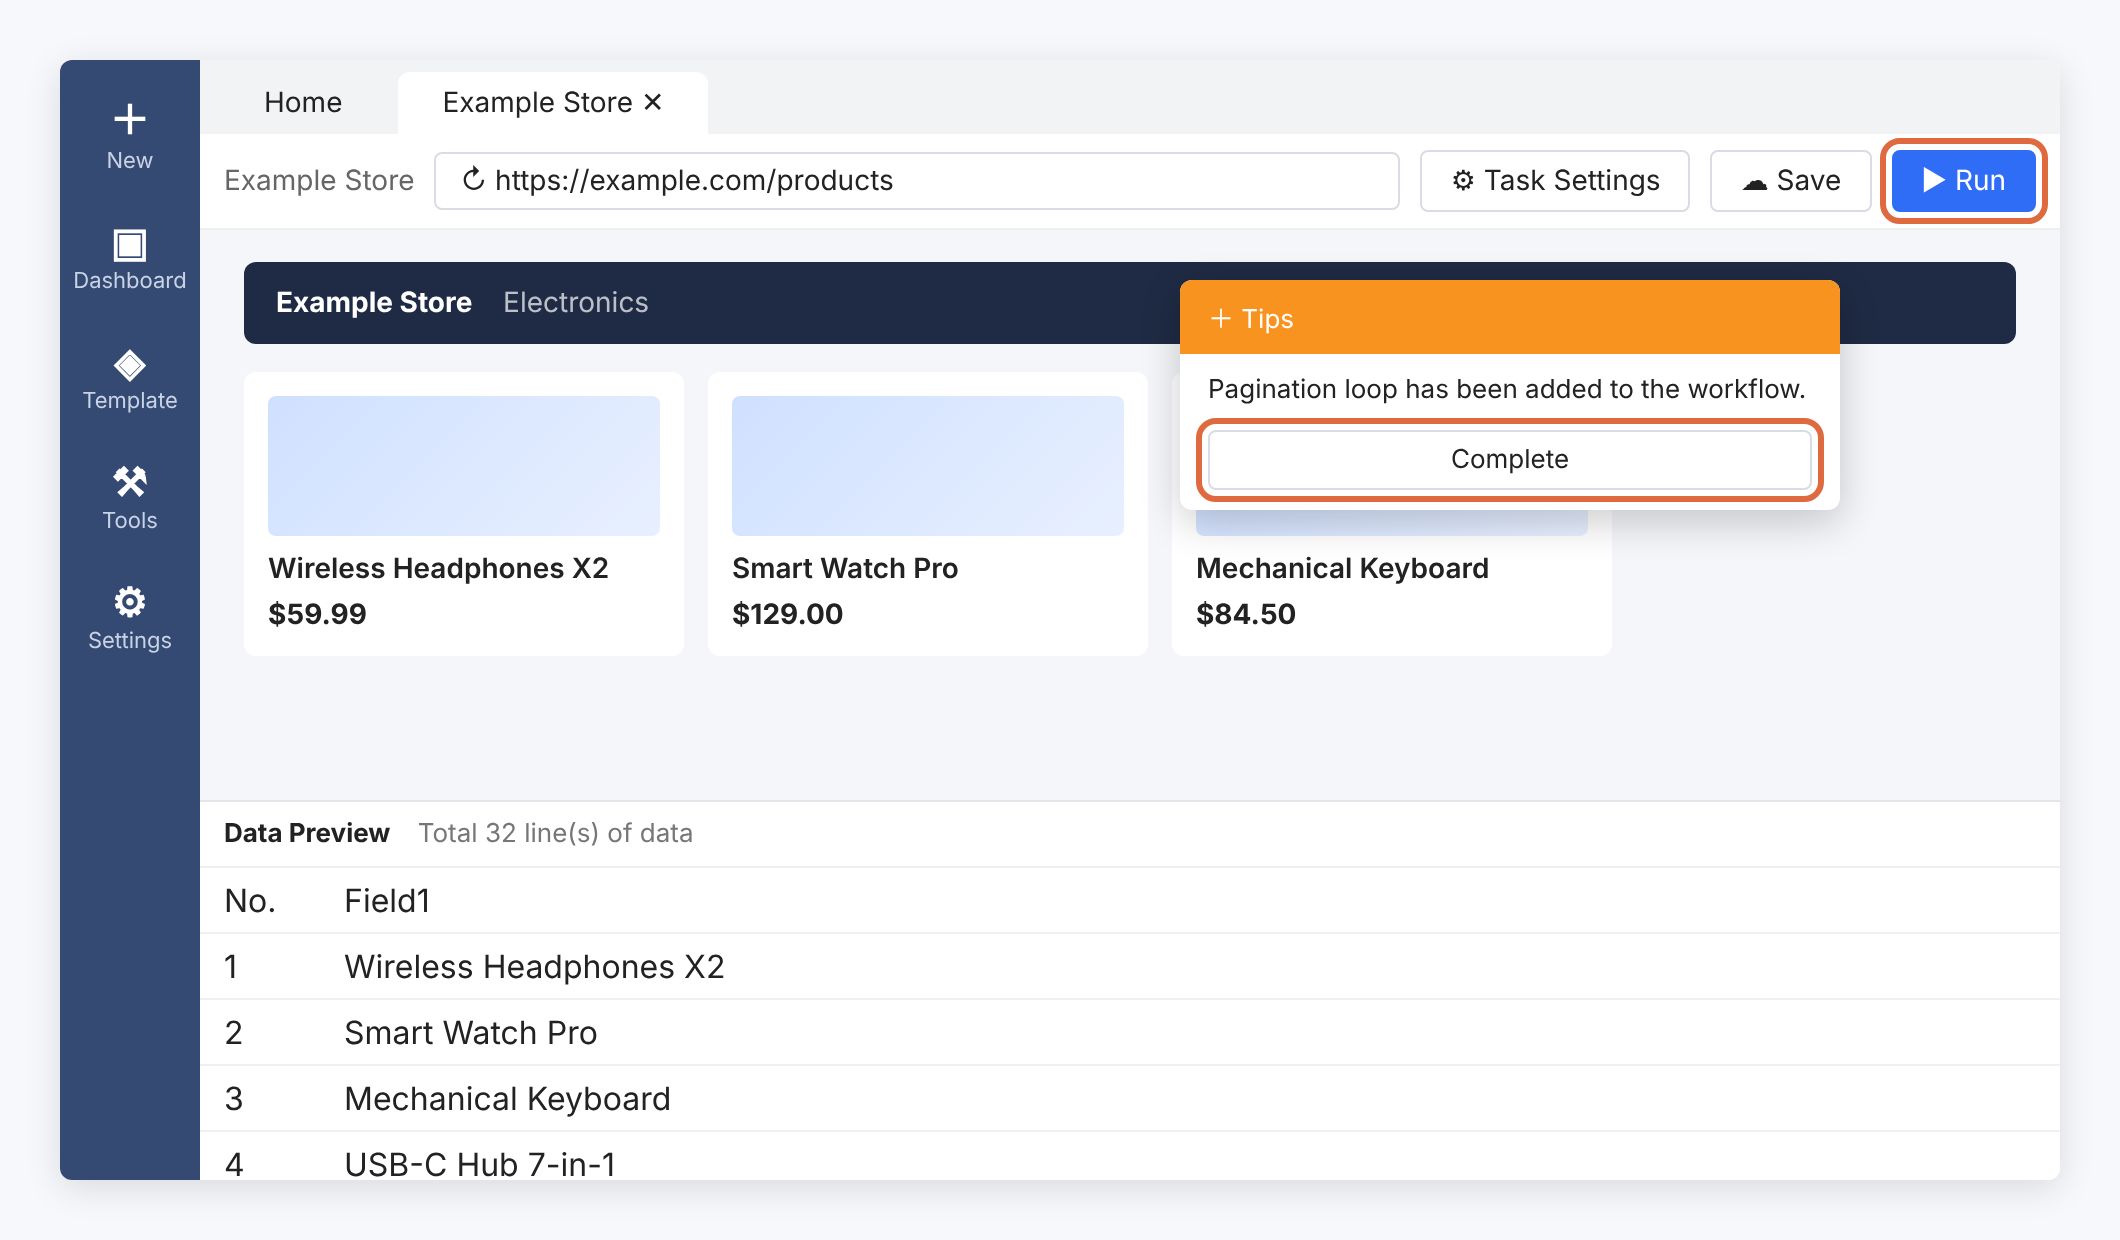
Select the required page elements, use the appropriate text extraction action, and confirm the fields in Data Preview. Add the next-page workflow only after the first page extracts correctly.
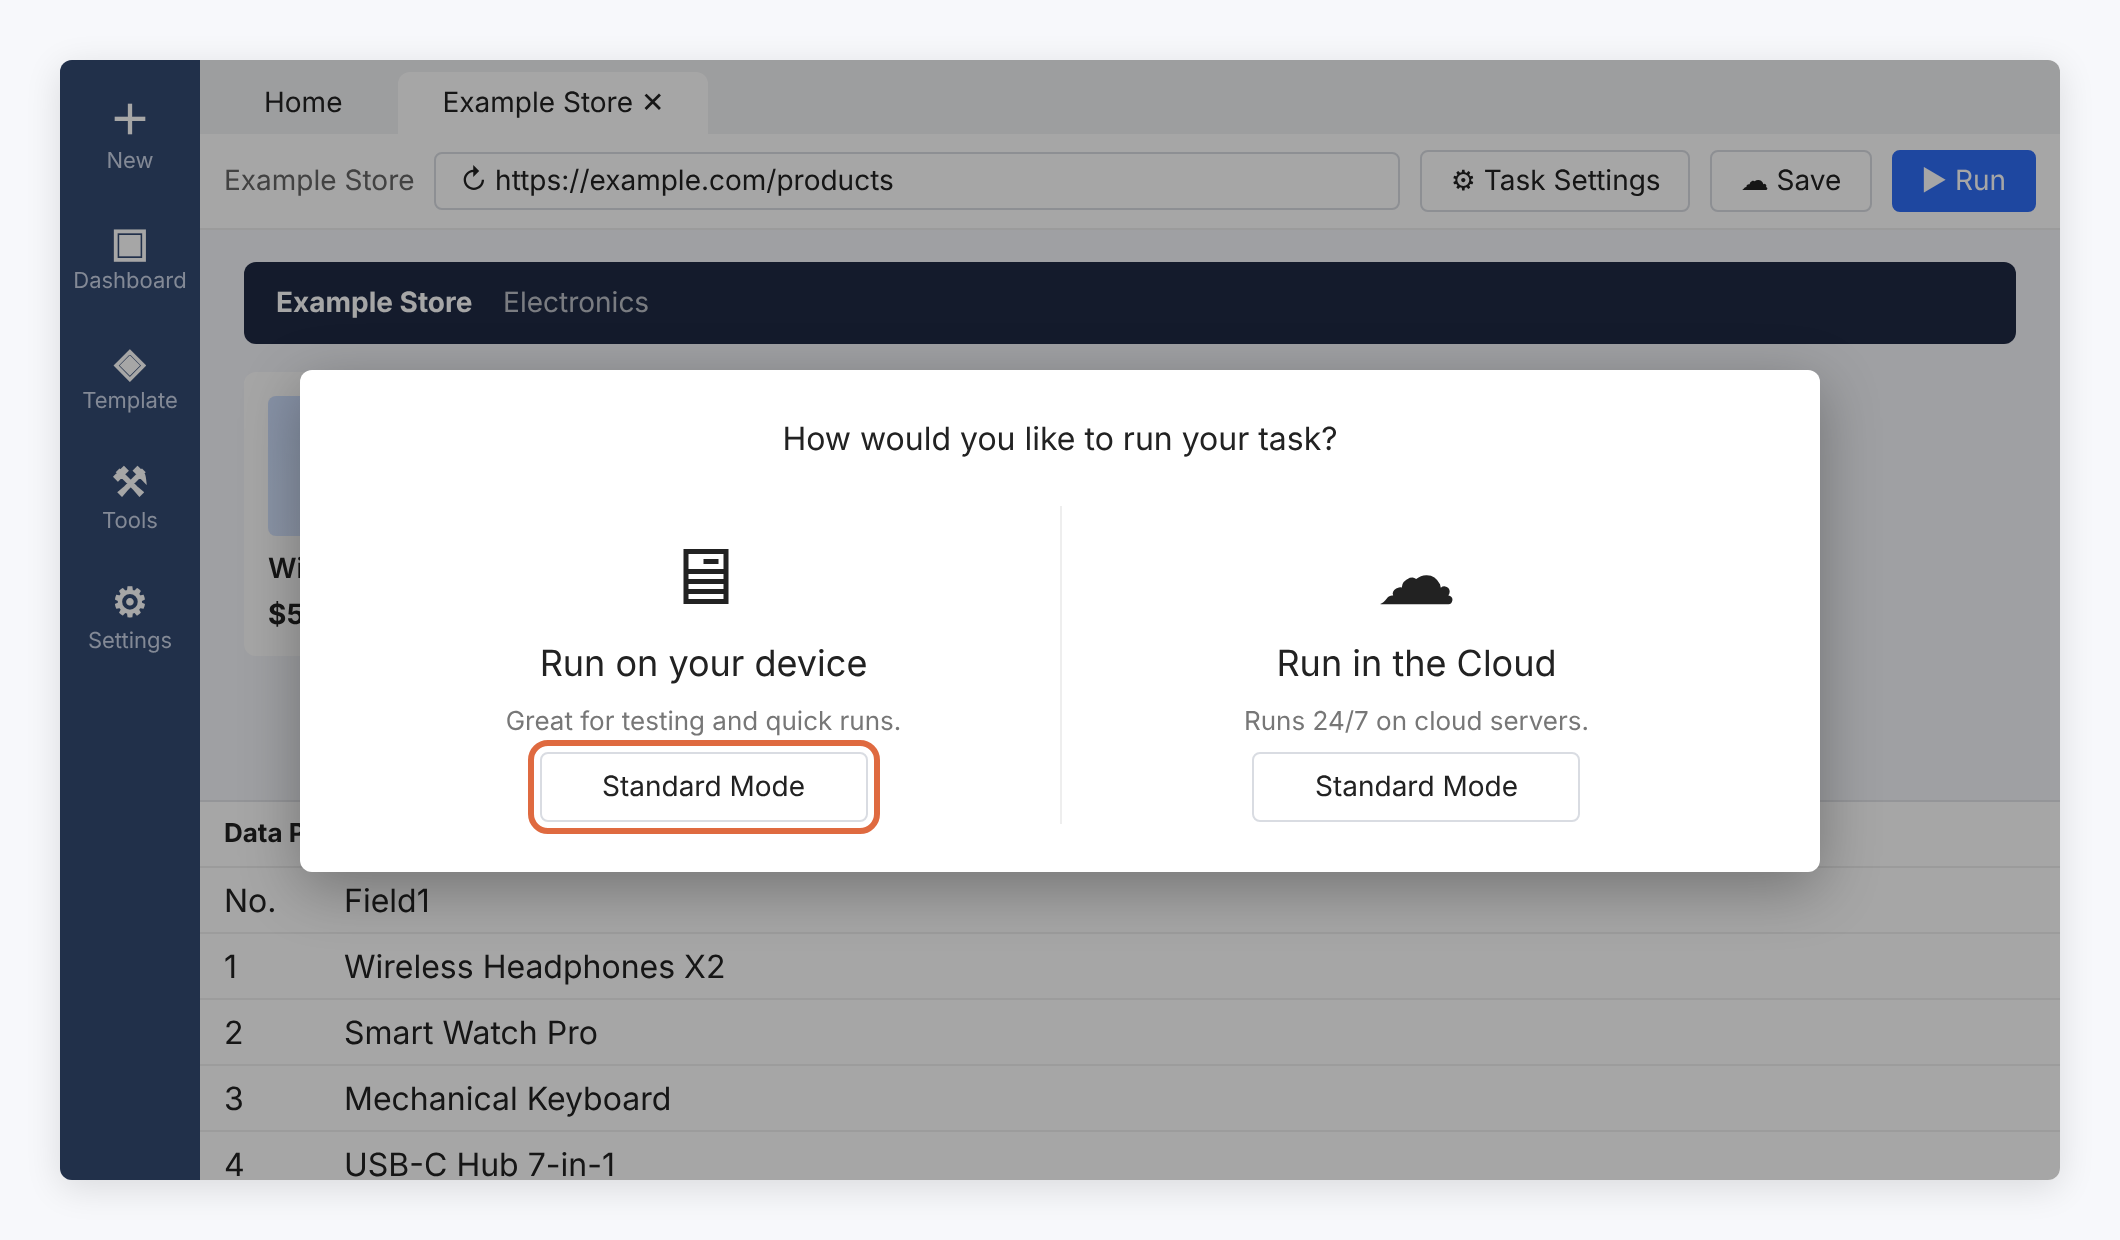
Complete the task and choose Run on your device / local run. Select Standard Mode where your release offers it. Do not select Cloud for this custom-proxy recipe.
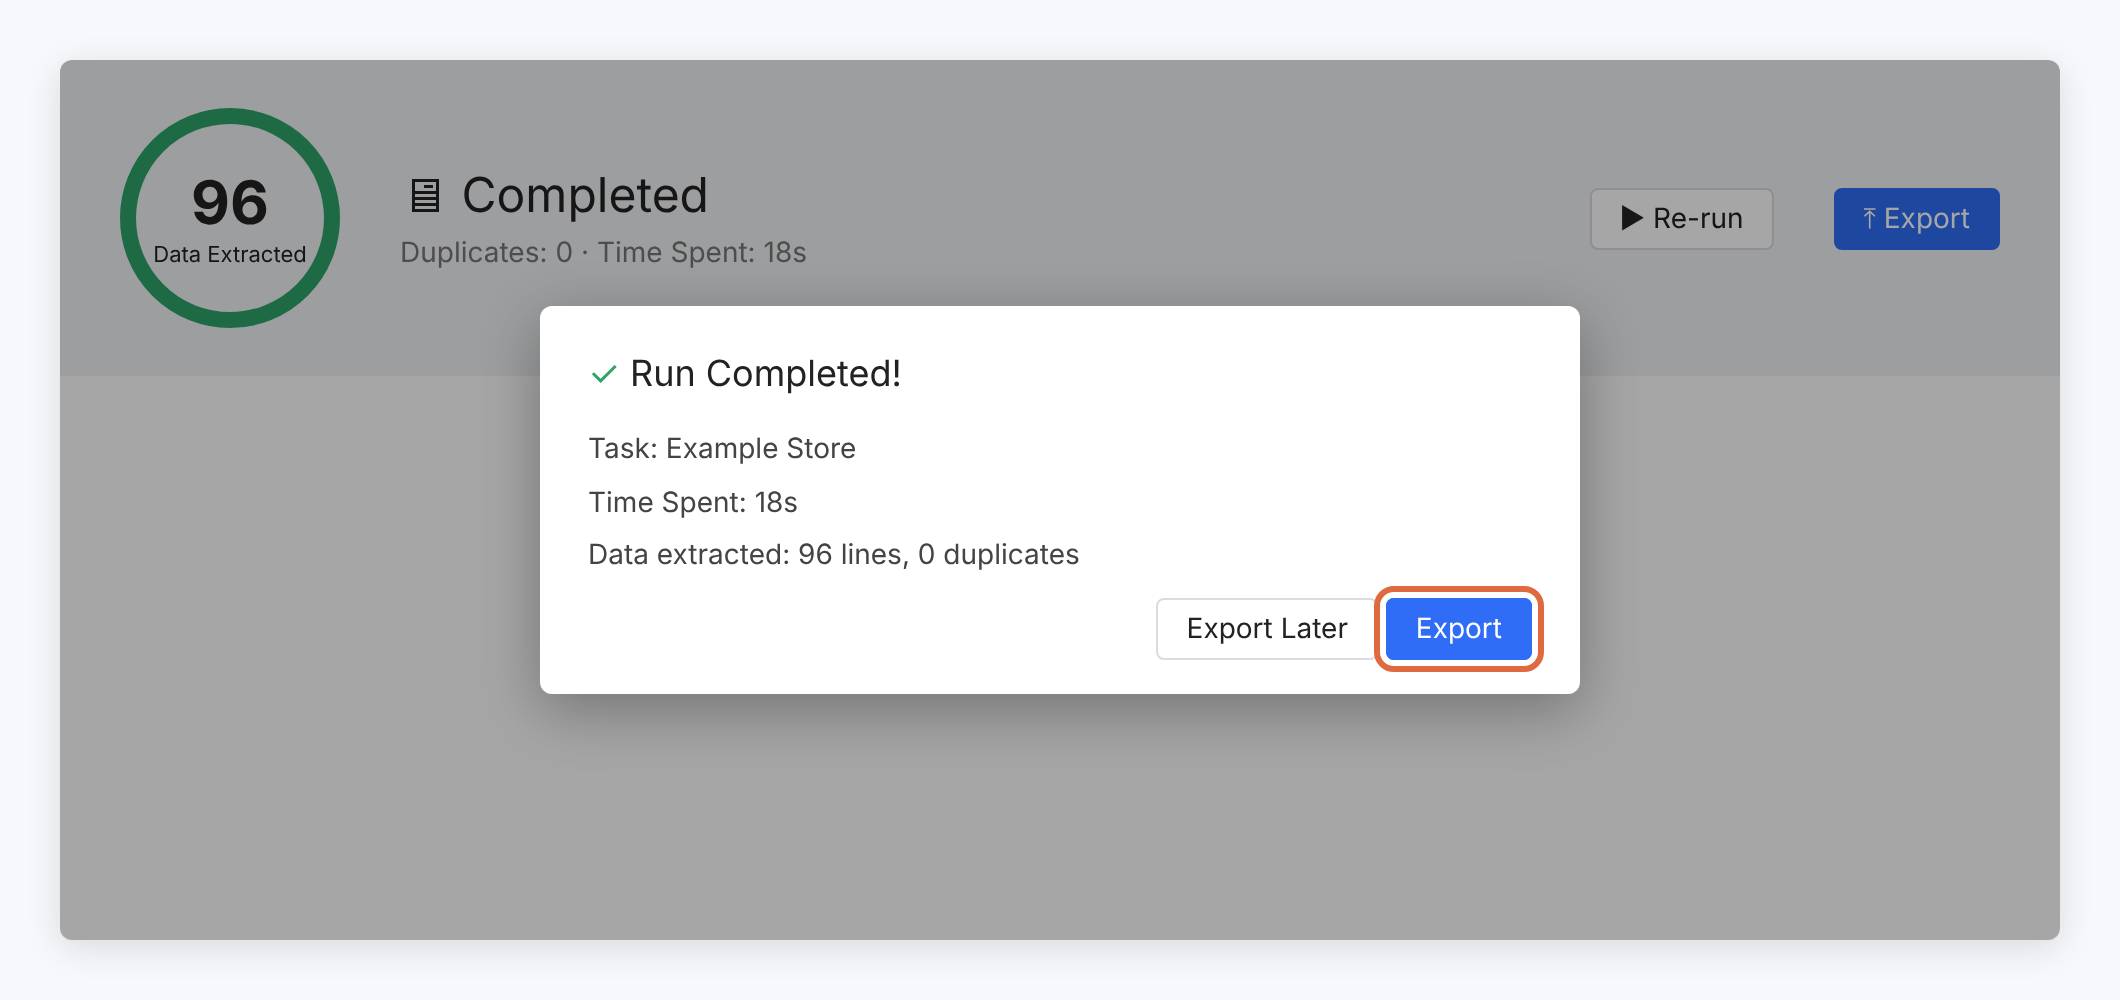
Inspect a small result and the proxy route before scaling, then export in a format supported by your edition. A proxy does not guarantee that a target will accept a request or remove CAPTCHAs. Stop the bridge with Ctrl+C when the run is finished.
Troubleshooting
The proxy string is rejected
The documented custom format is IP:port without authentication. For a password-authenticated upstream, use the loopback bridge entry.
Cloud run takes another route
Custom proxies in this workflow are local-only. Cloud runs use Octoparse’s supported built-in proxy service.
The local entry stops working
Keep the helper running and update the port if it restarted. Also confirm that task-editing and task-running settings use the route you intended.